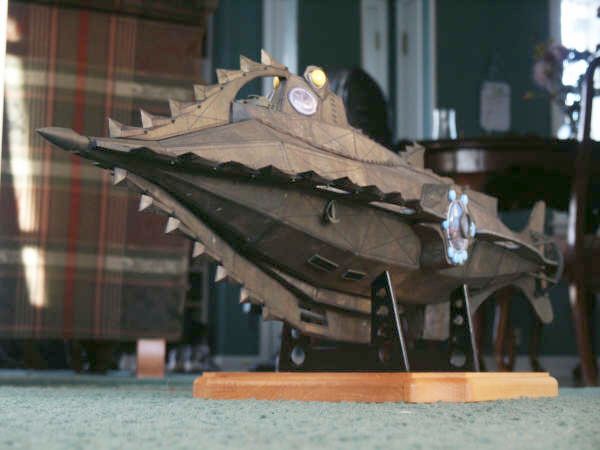
Detailing Your Nautilus:
Jon did a fabulous job of creating the Nautilus and it is great on its own. Here are just a couple of ideas I found helpful building and then enhancing the Nautilus (if you desire) with things other than paper.
Tips or Random Thoughts:
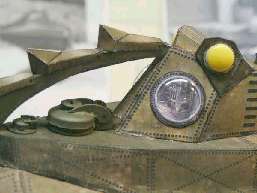
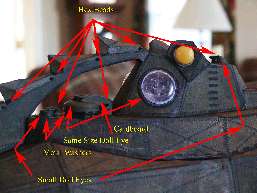
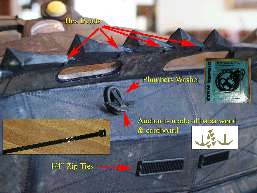
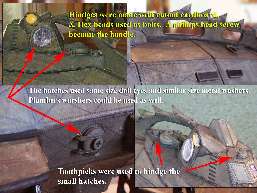
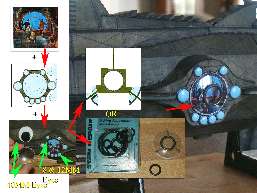
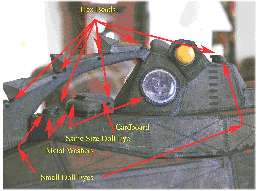
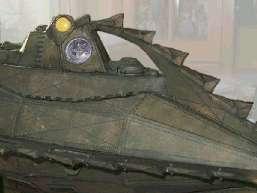
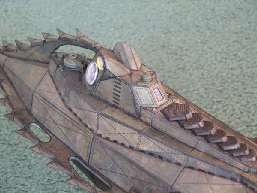
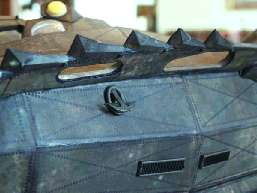
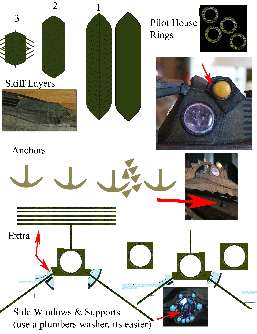
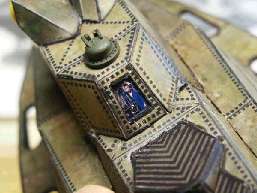
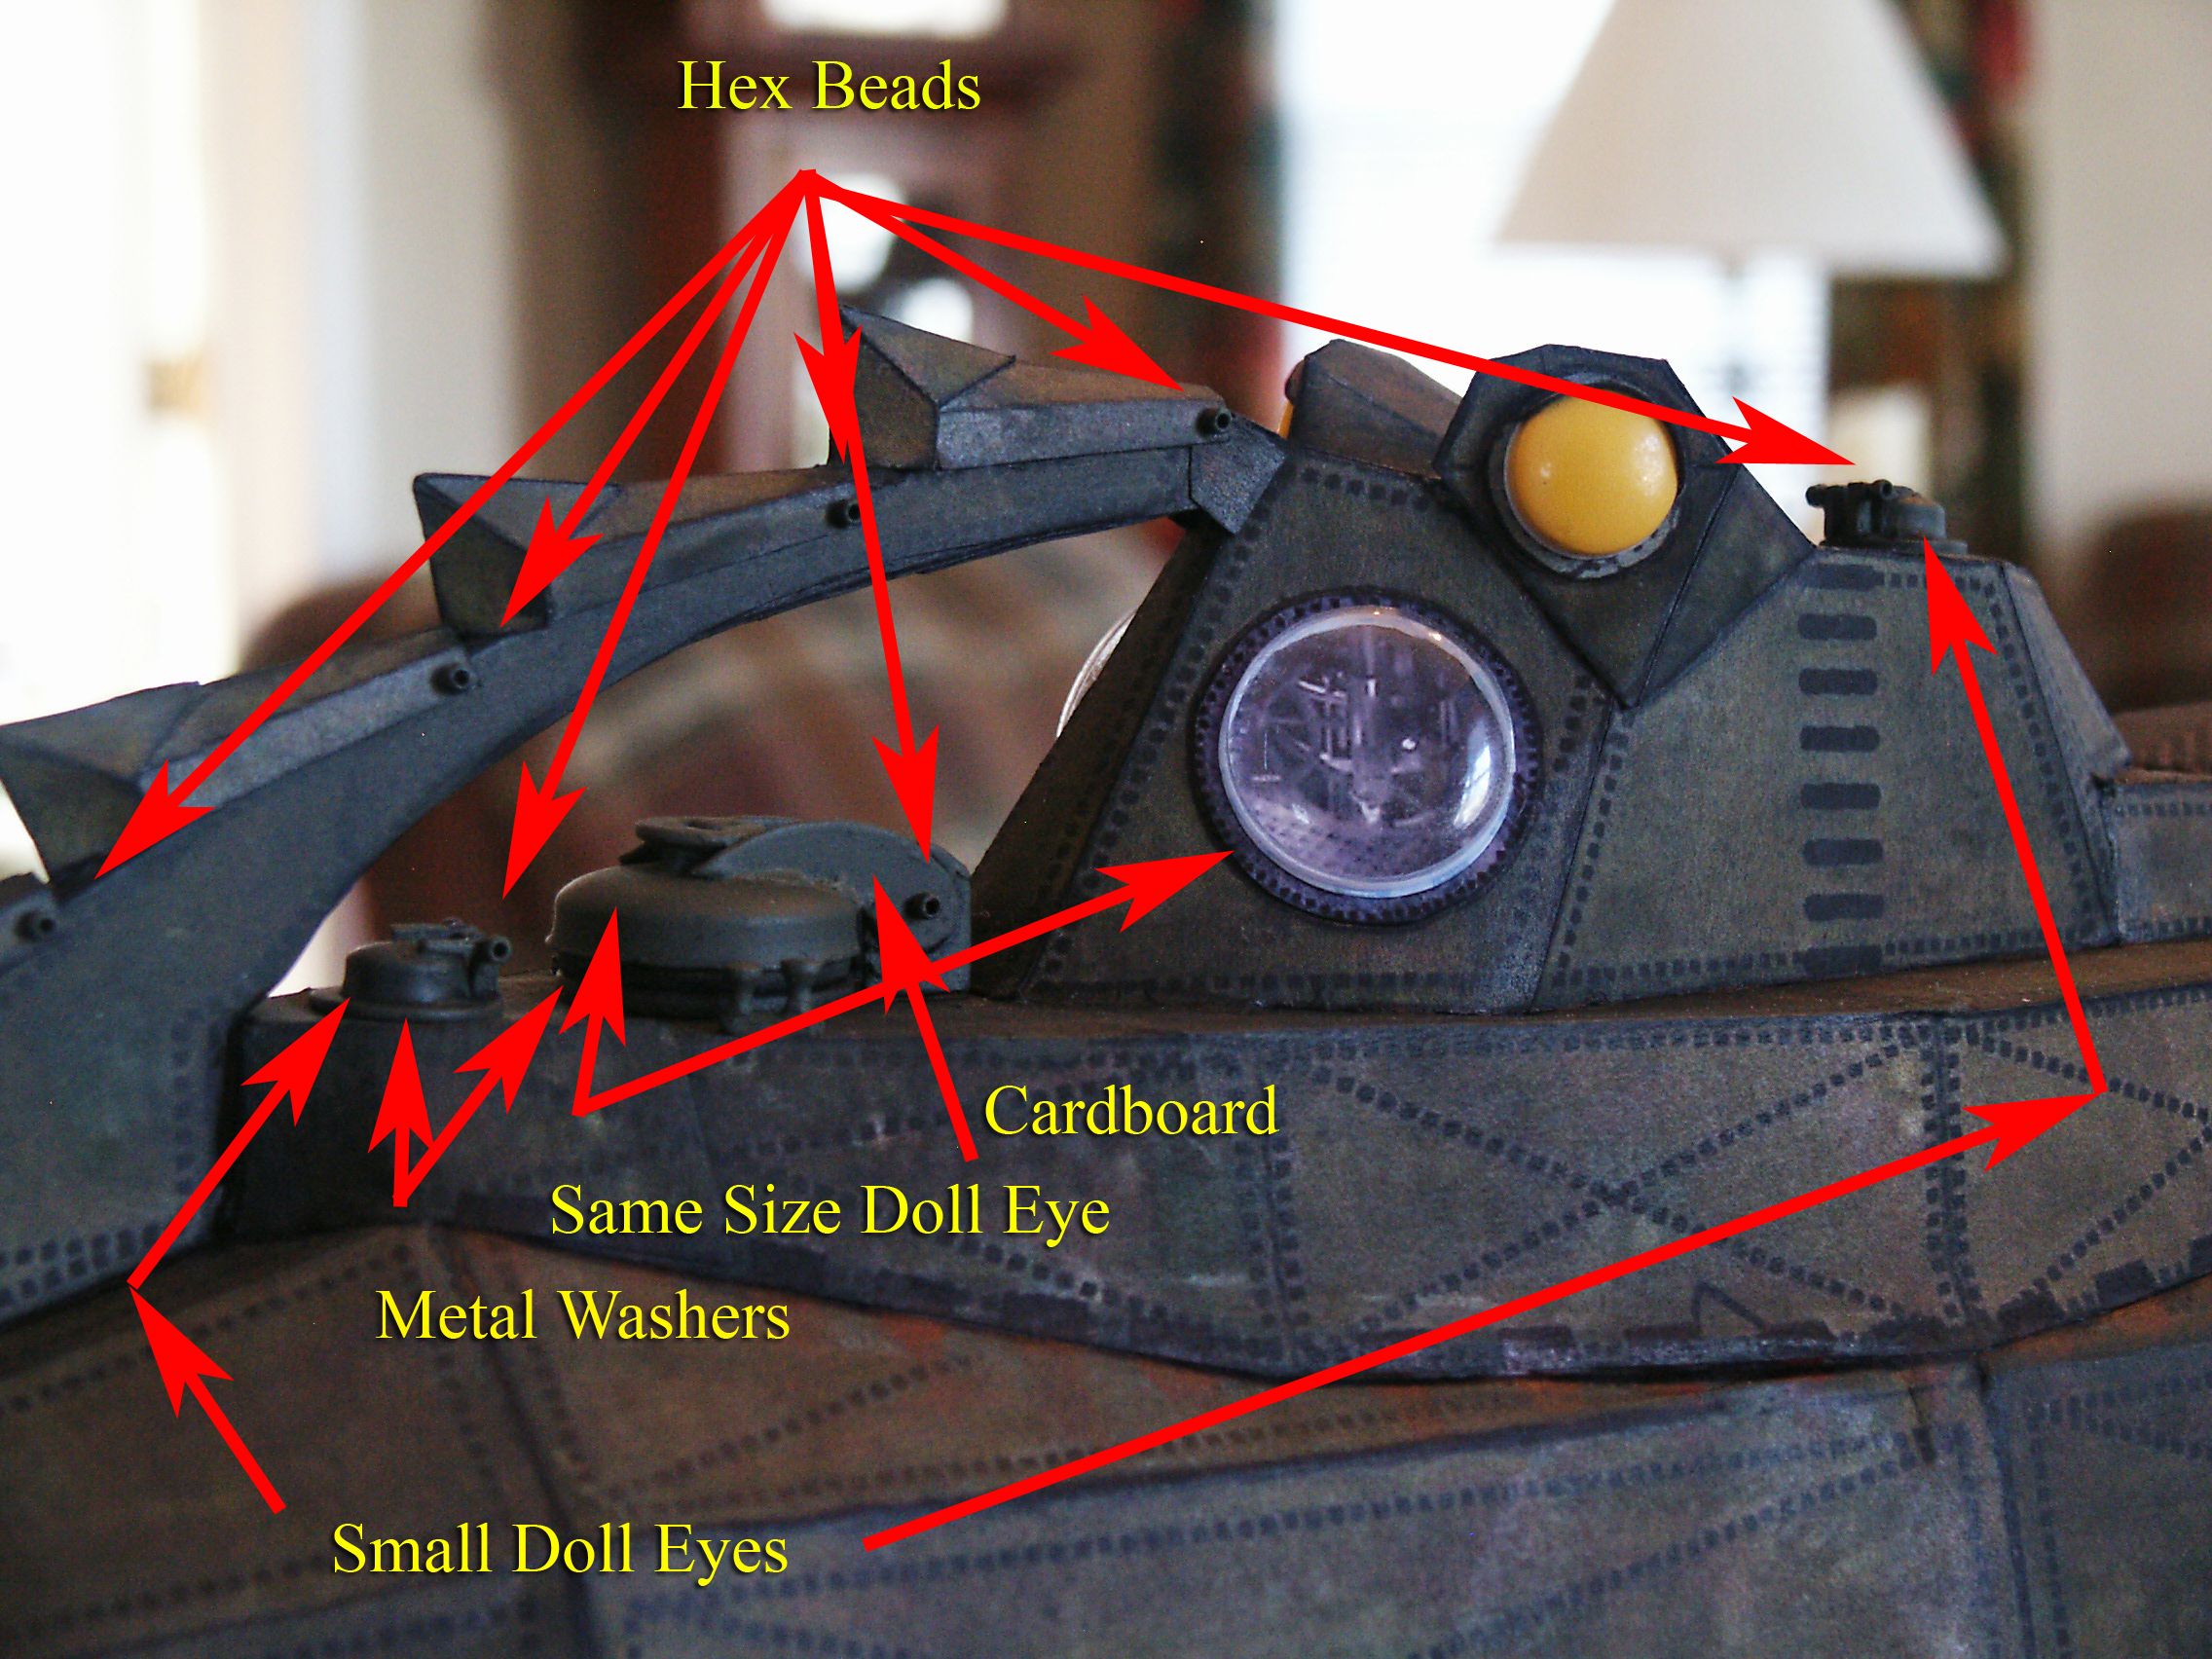
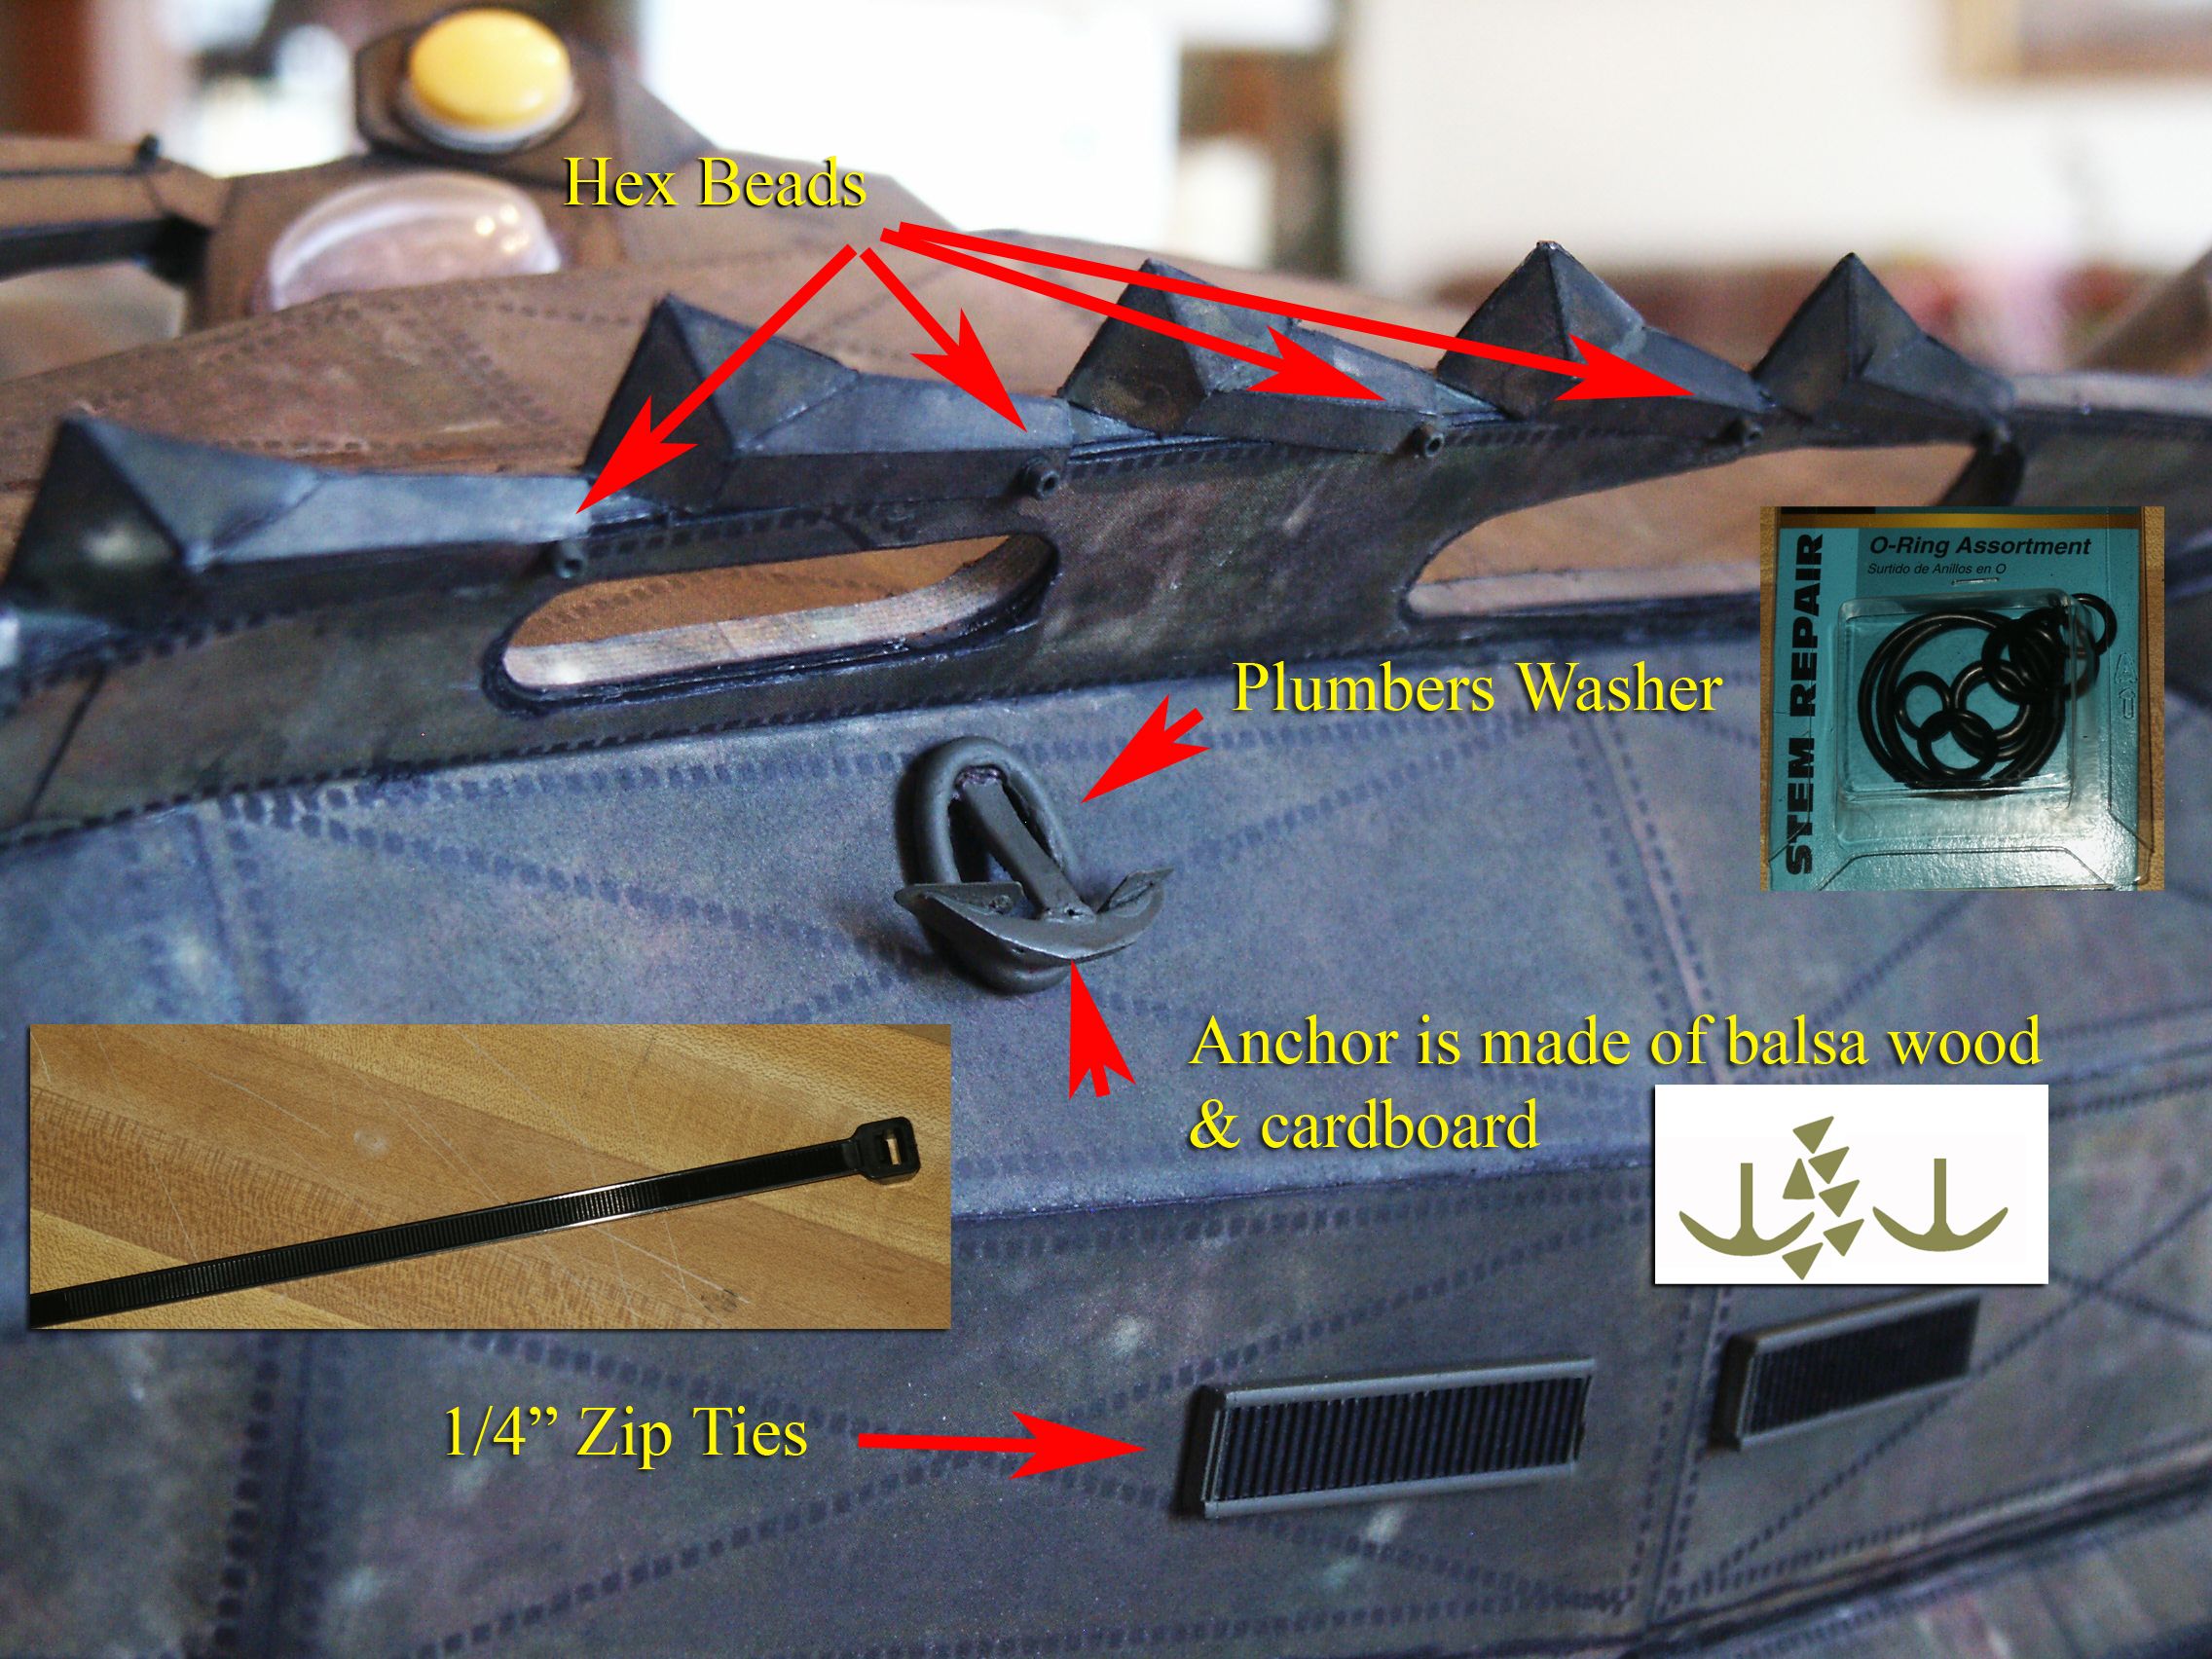
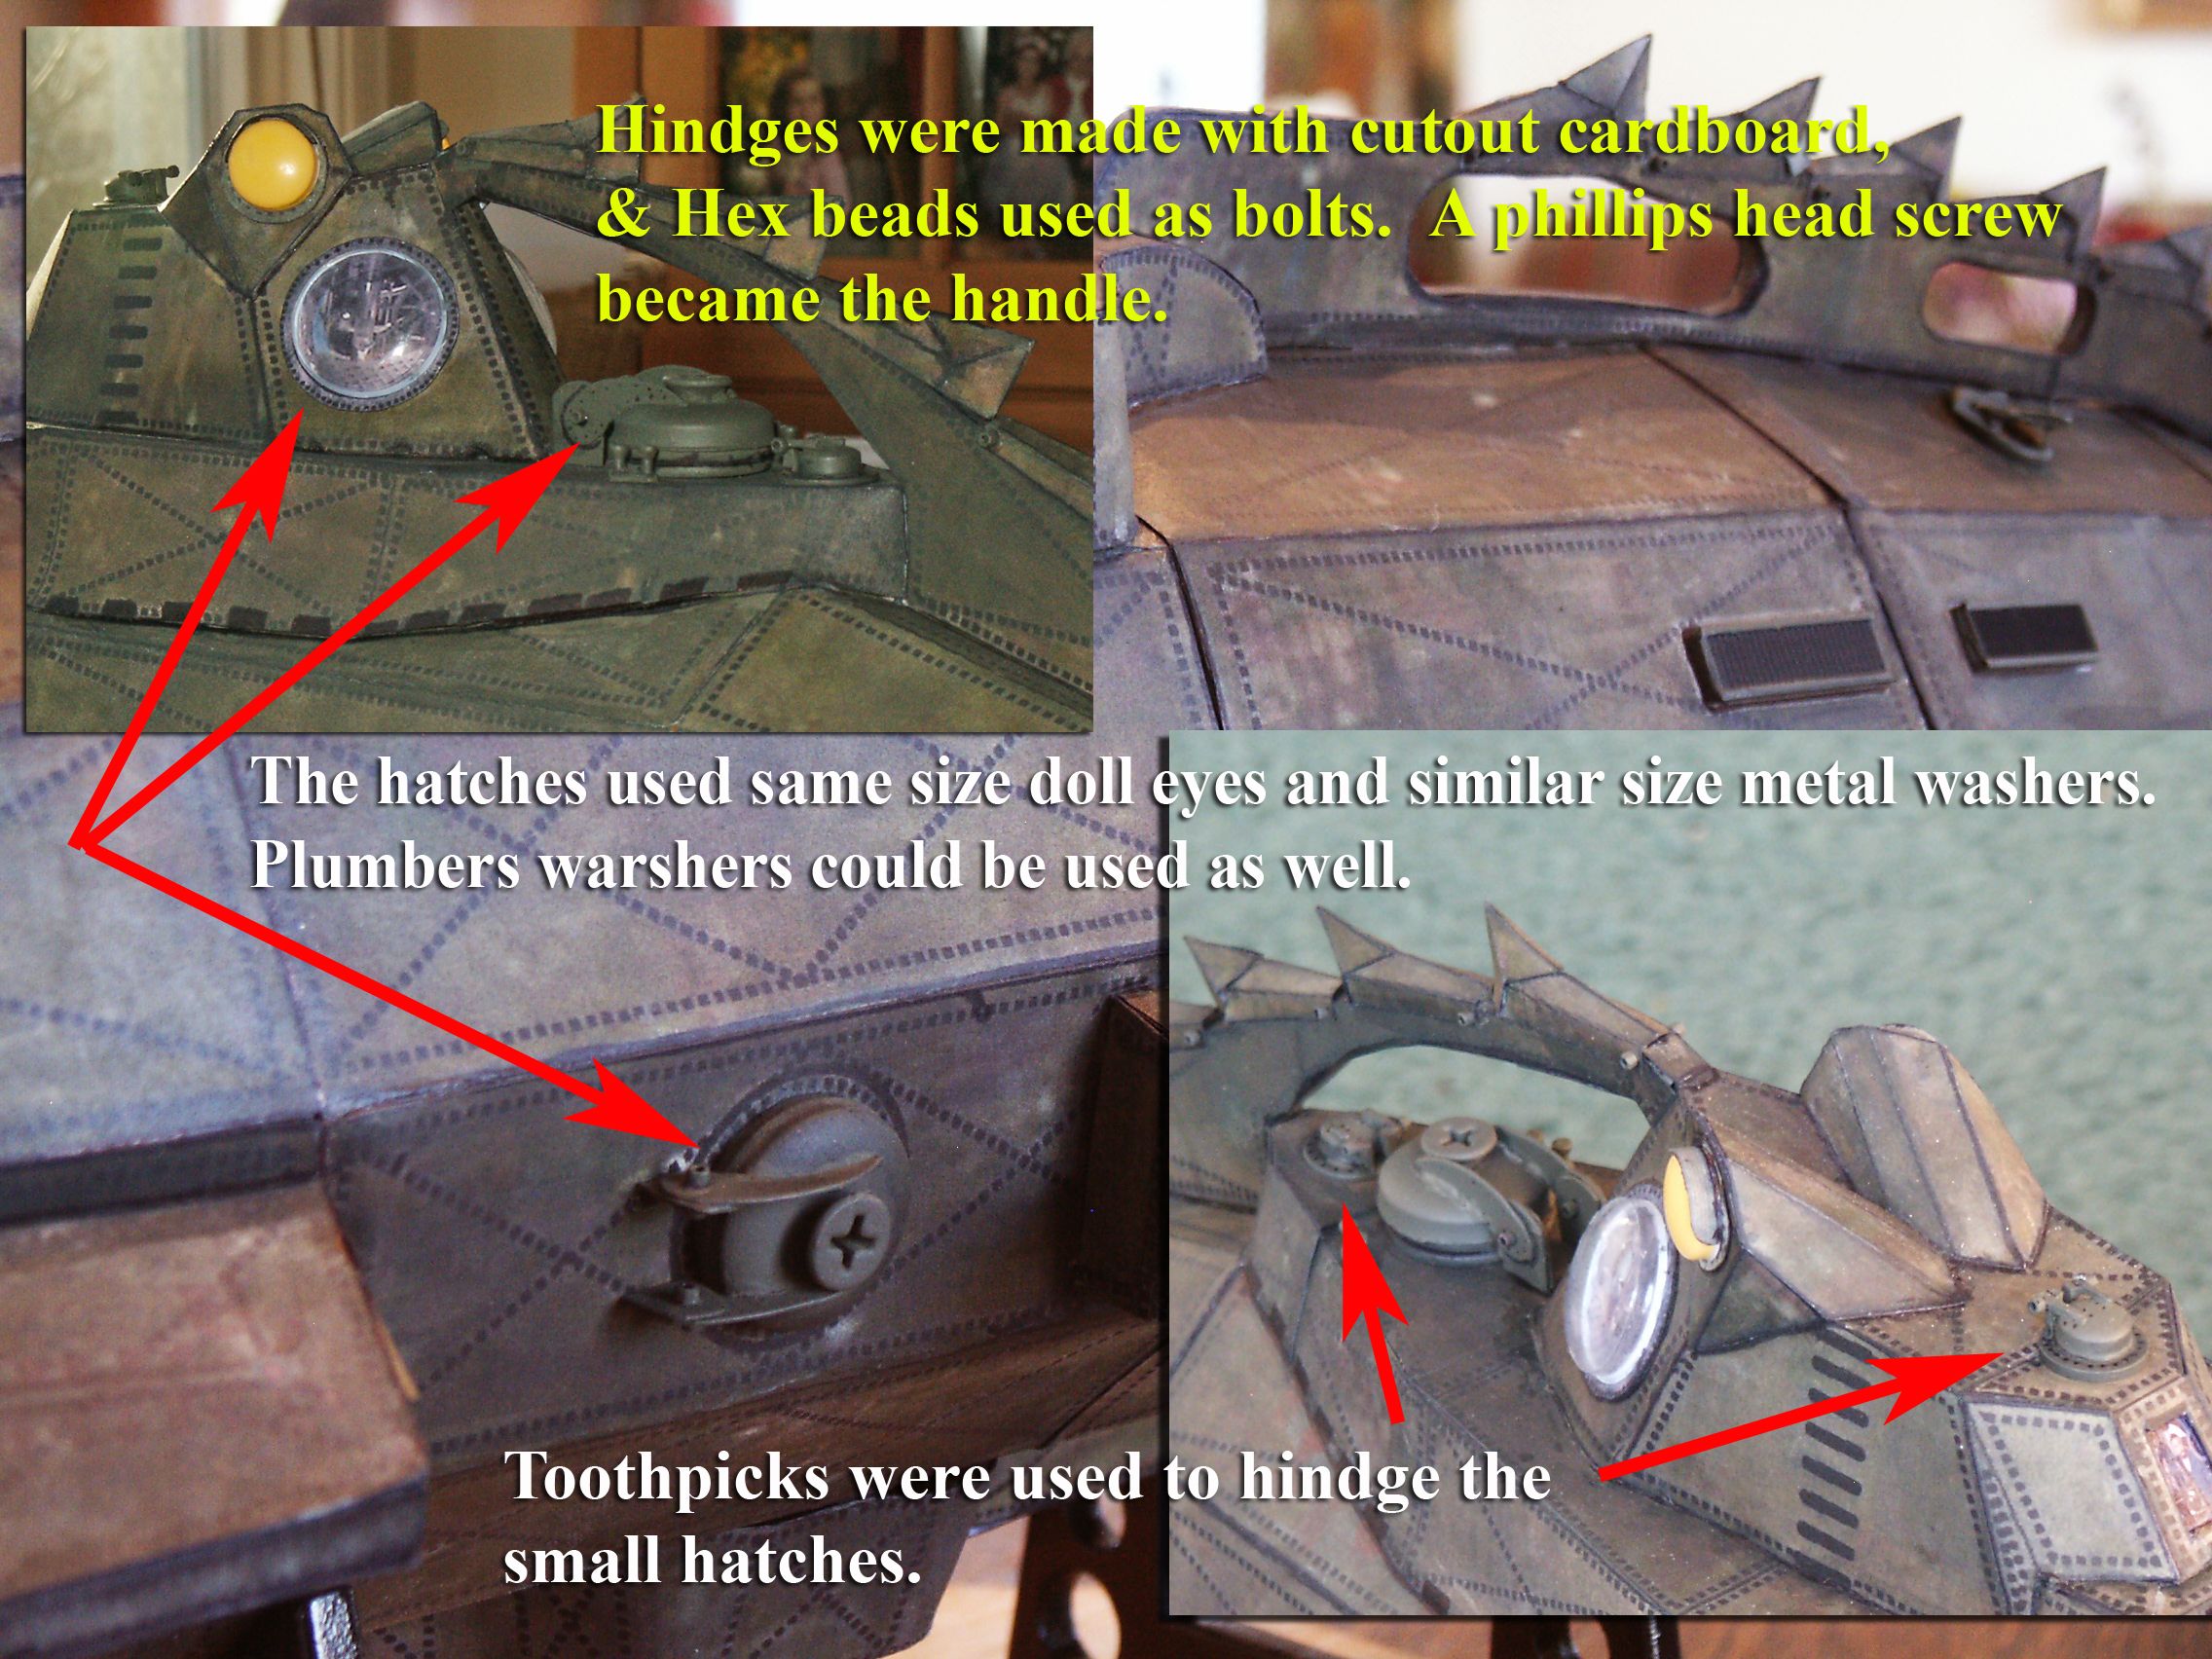
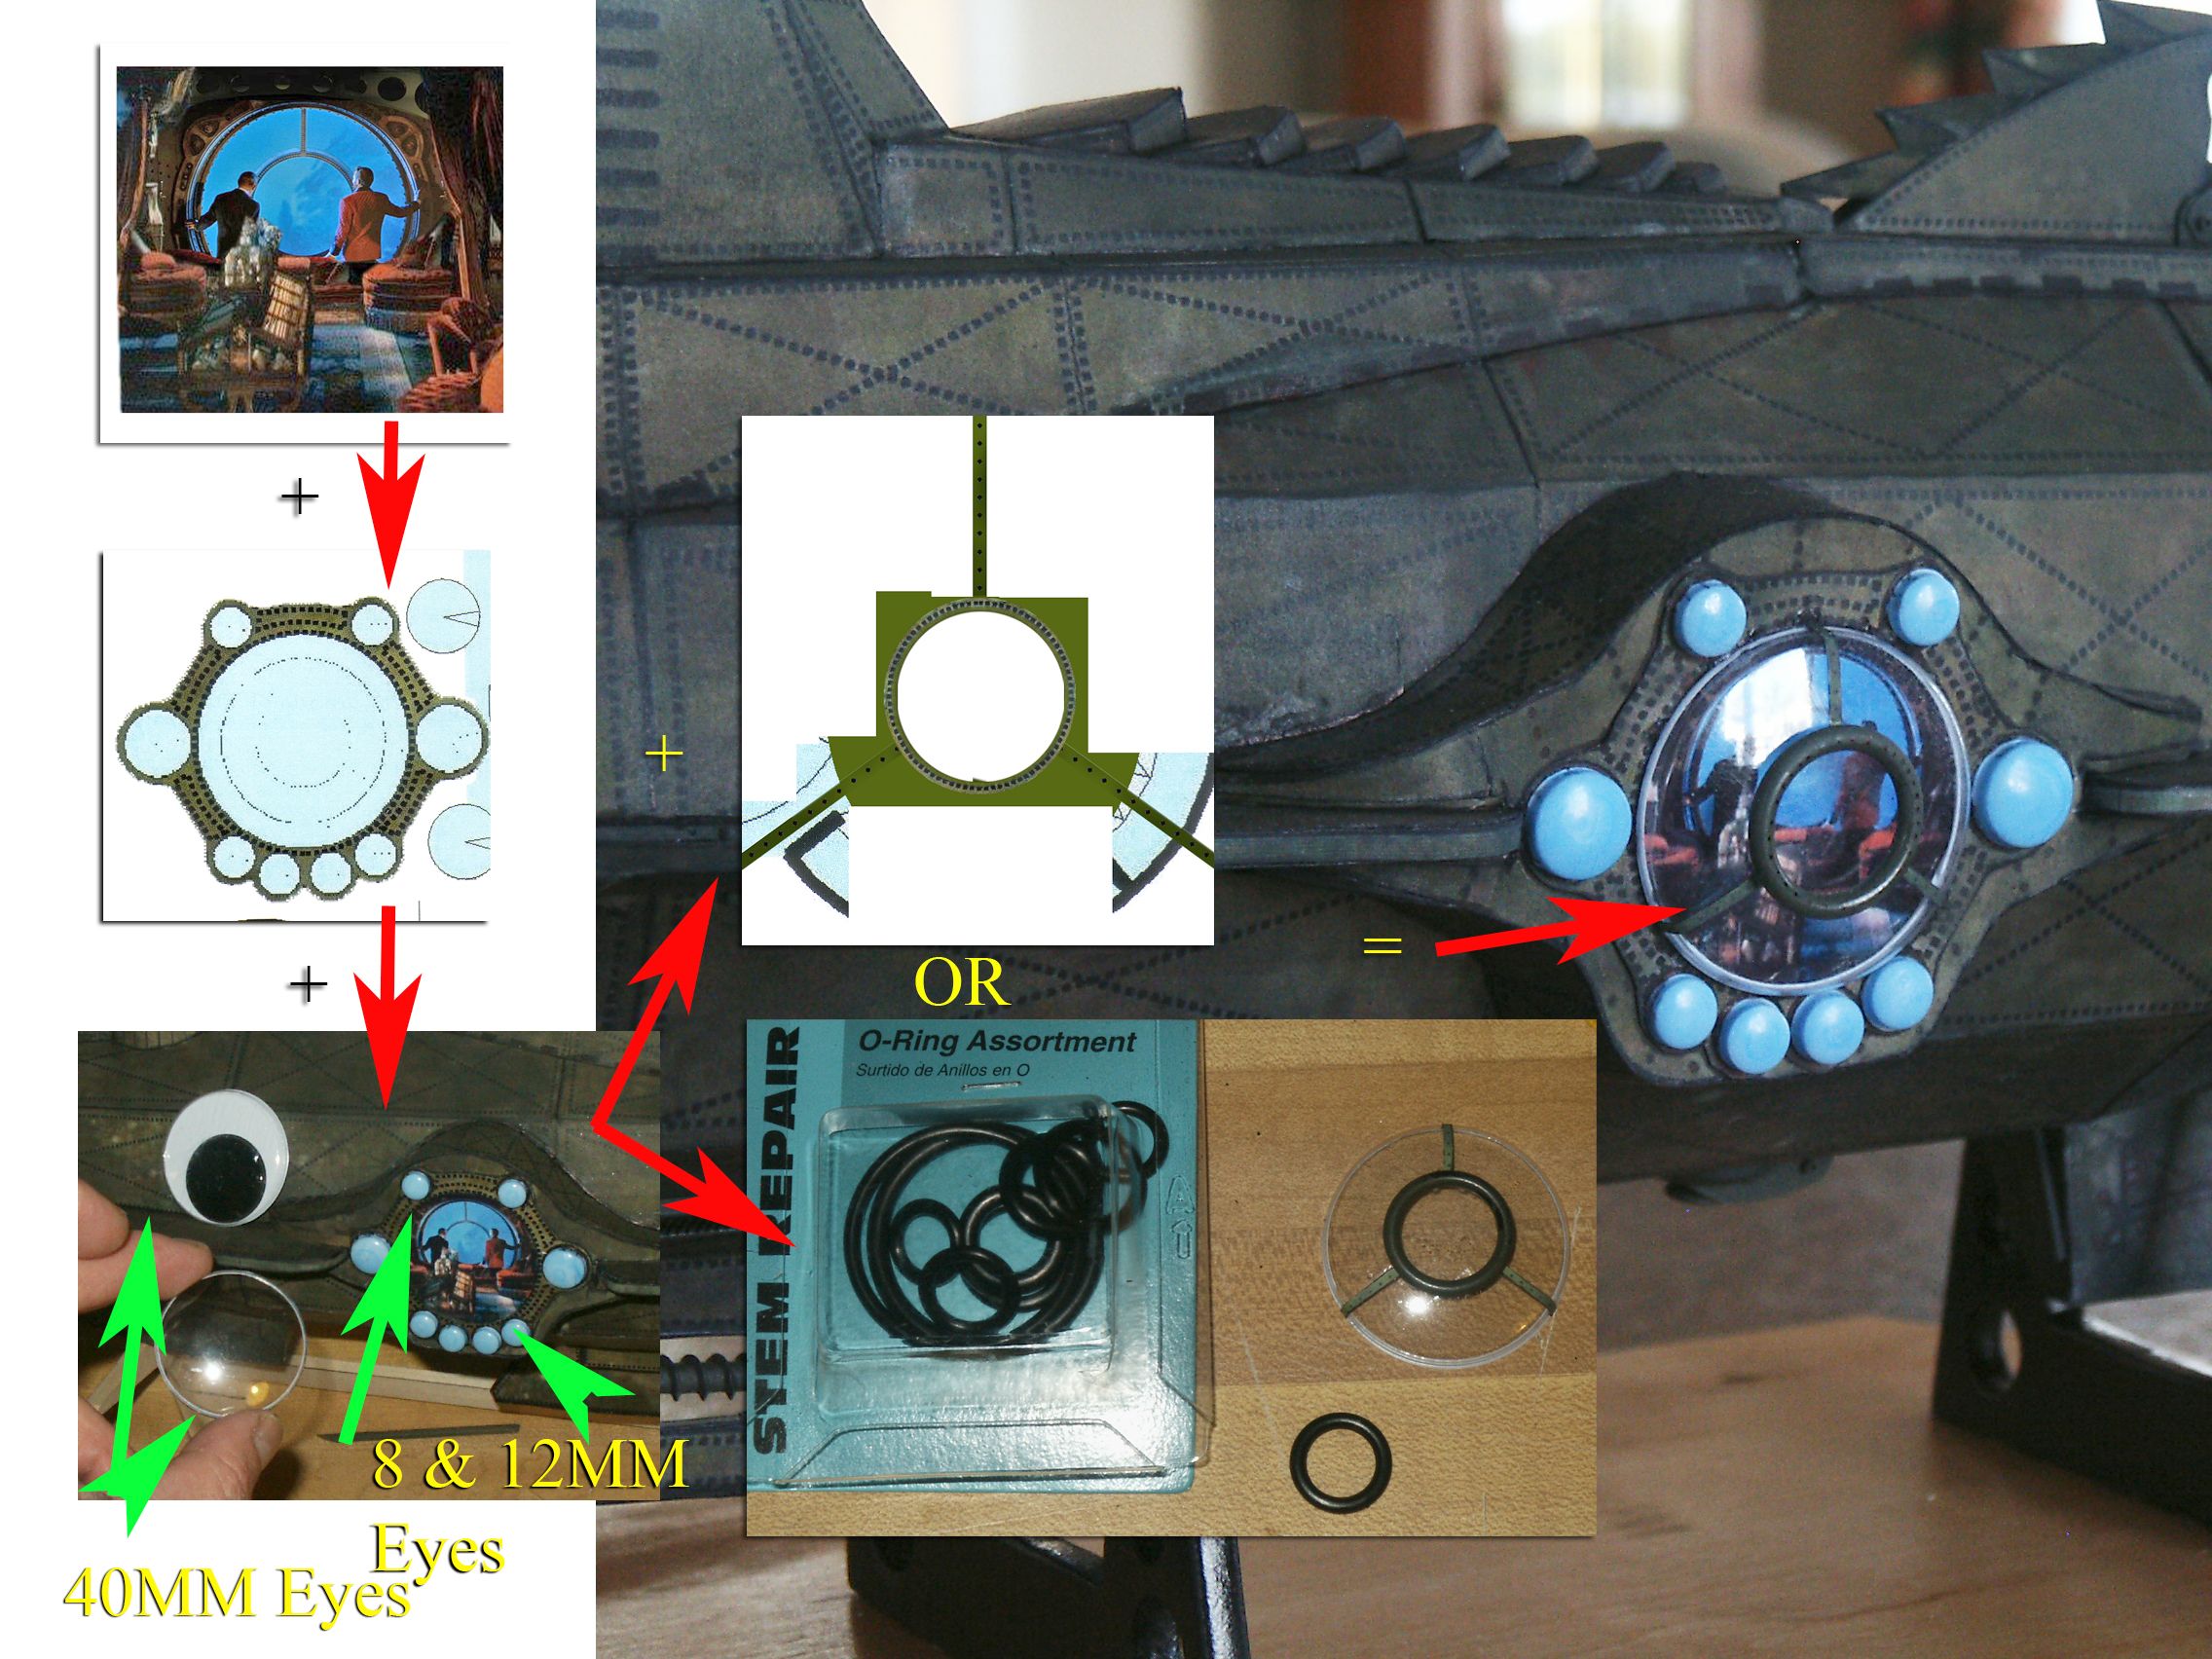
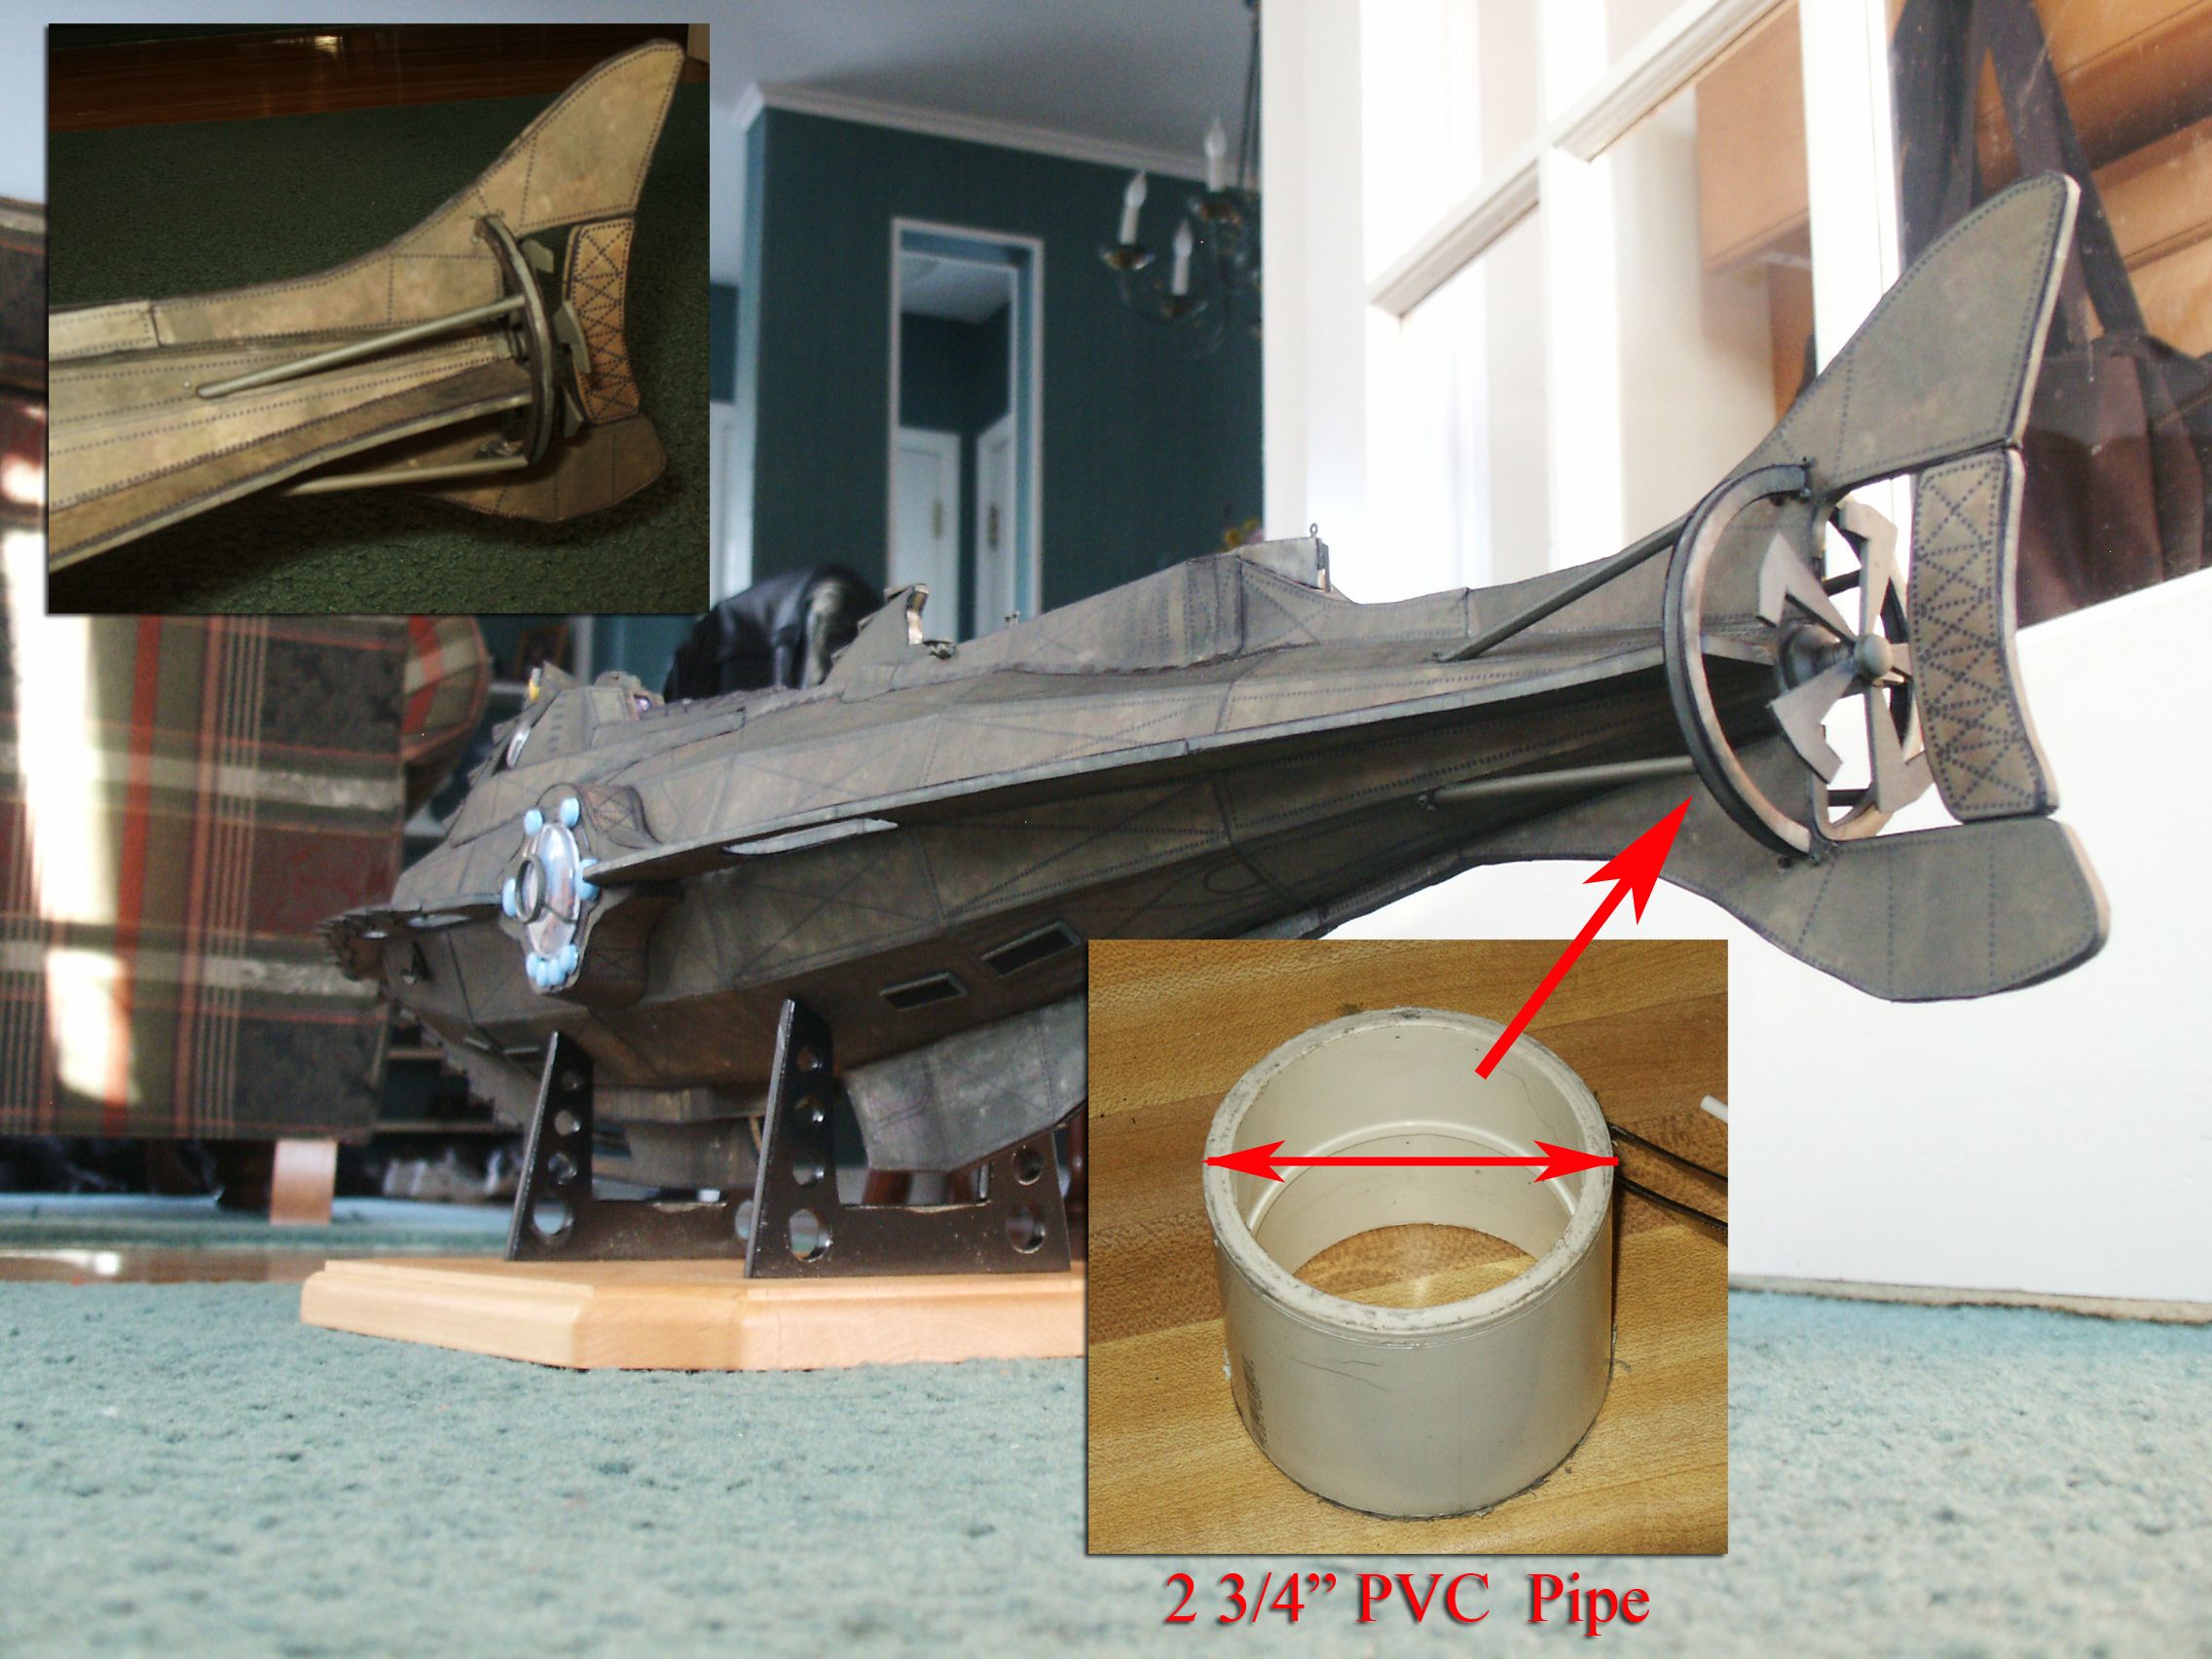
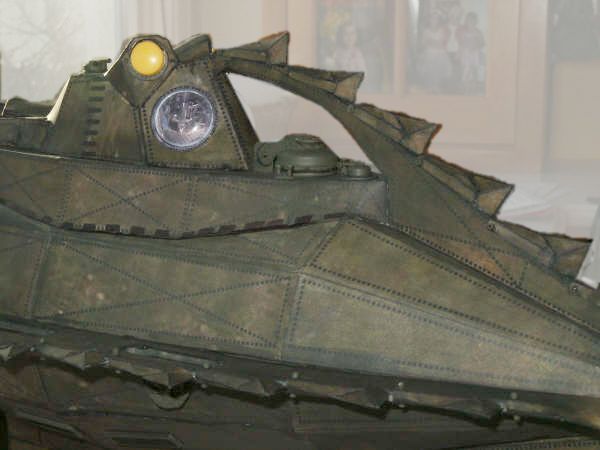
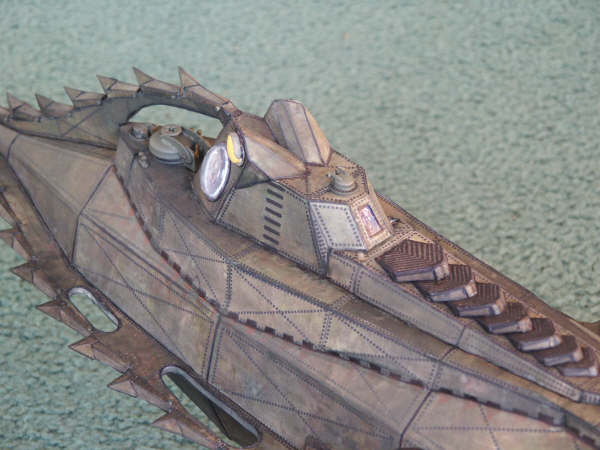
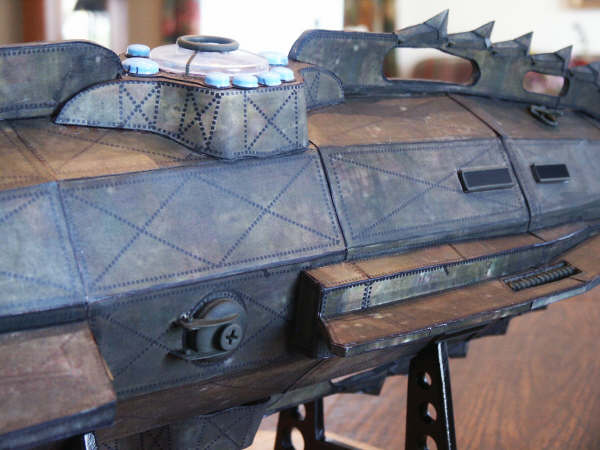
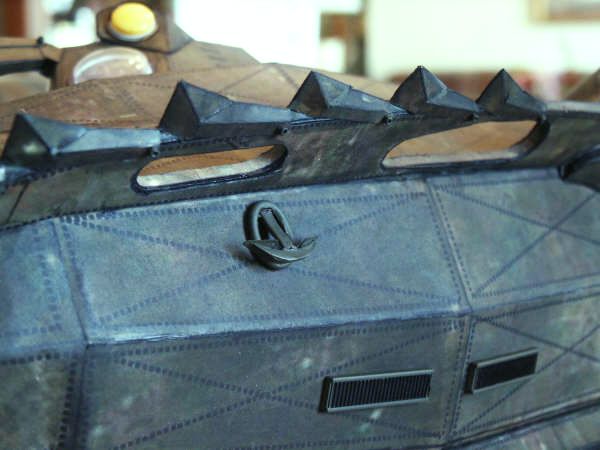
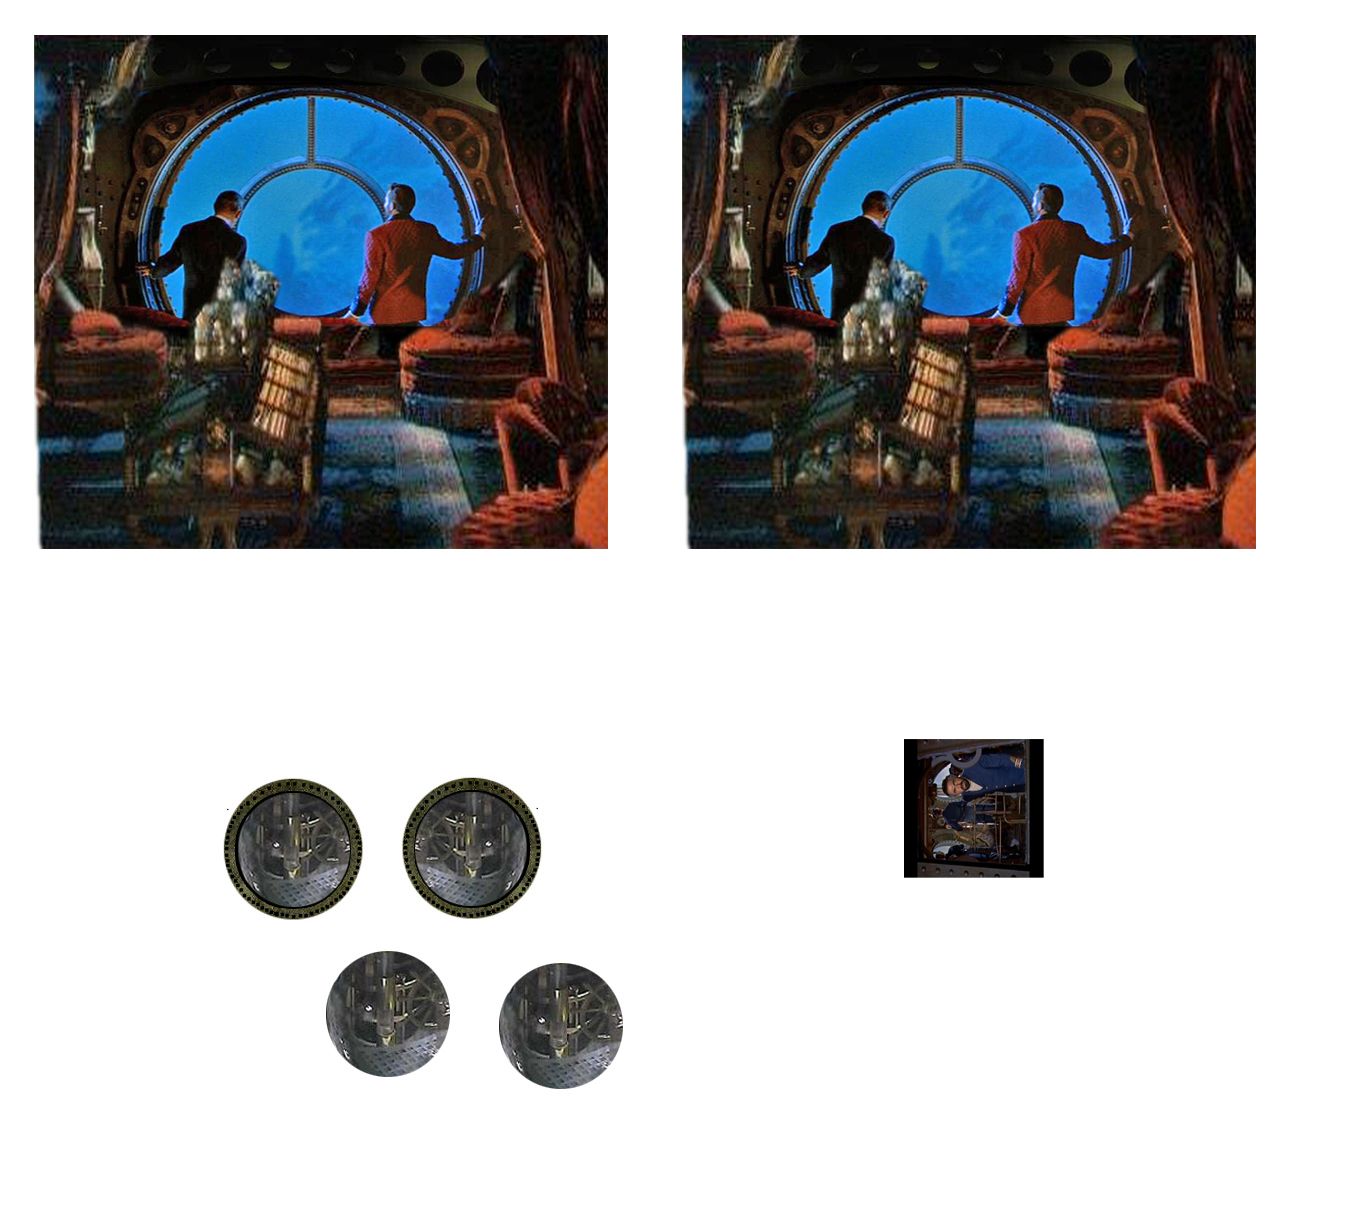
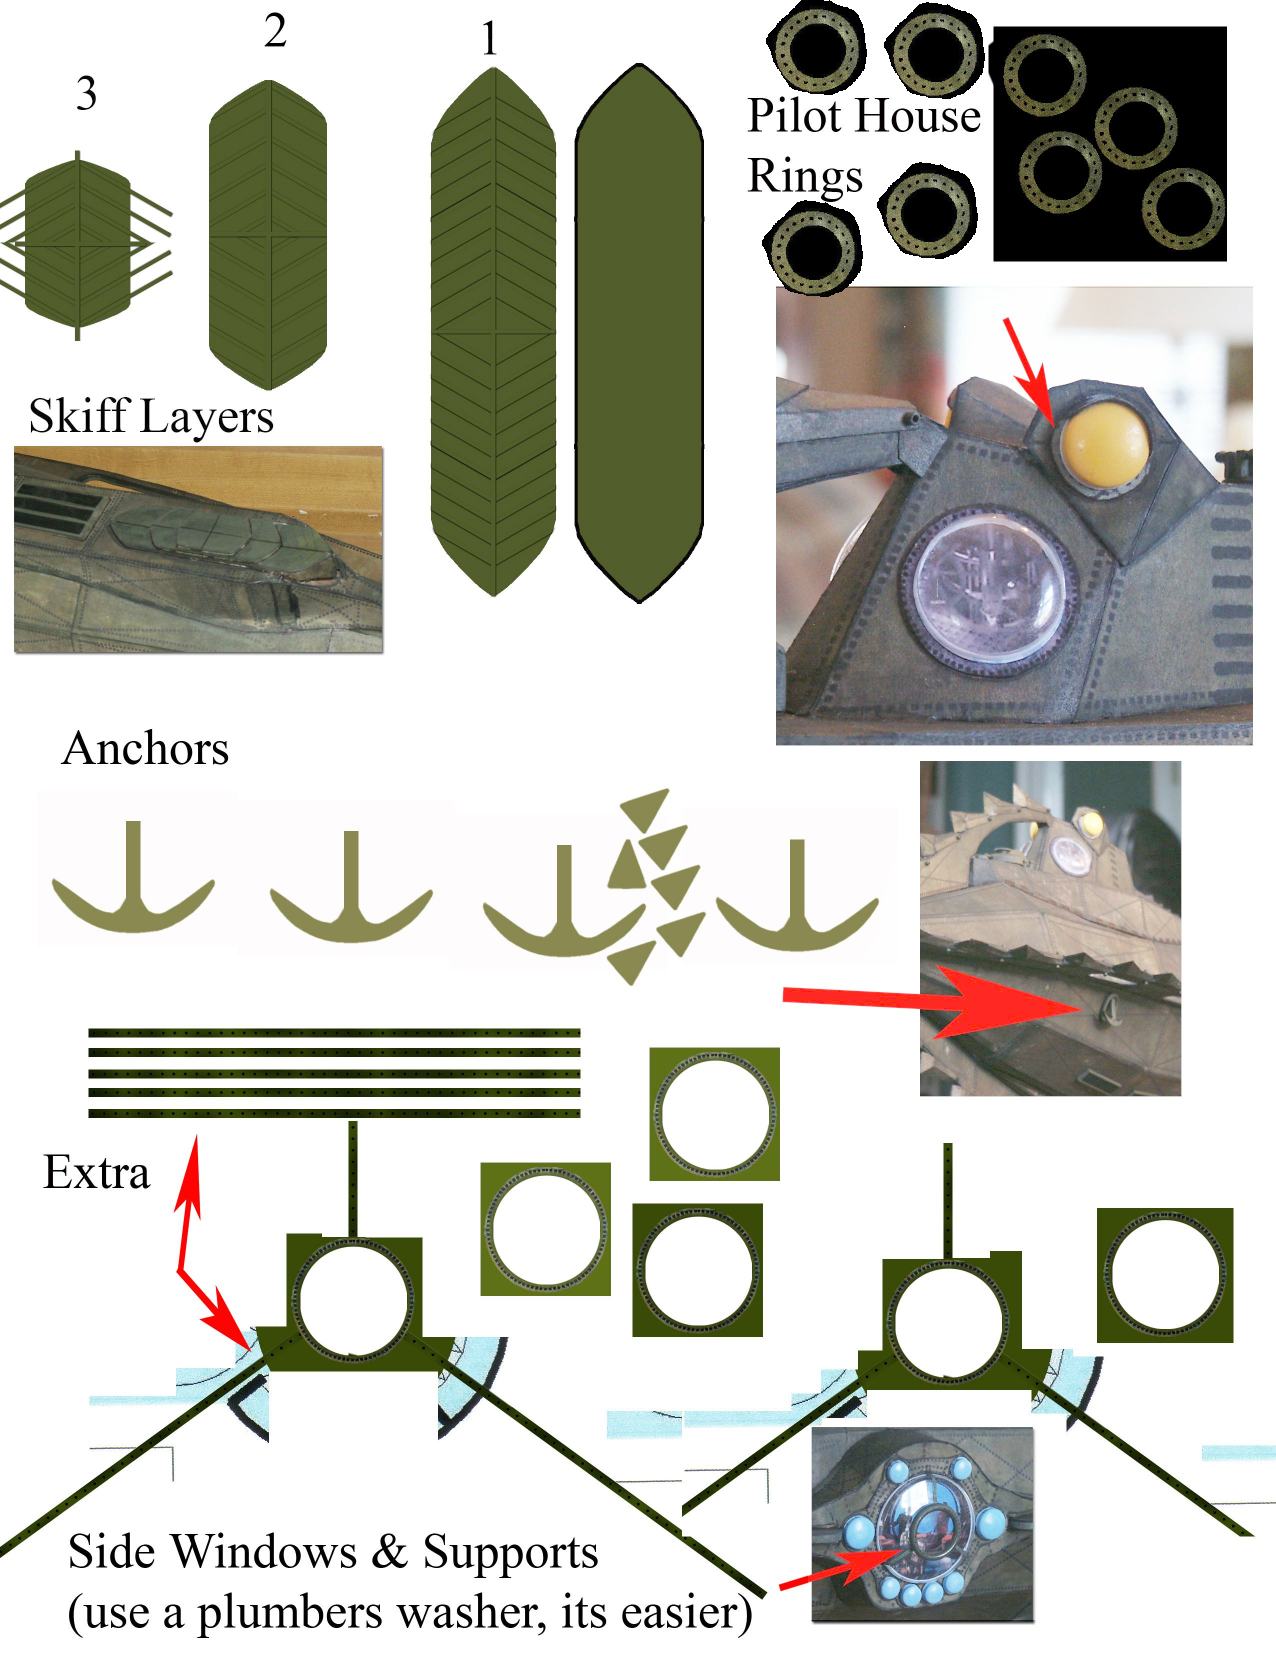
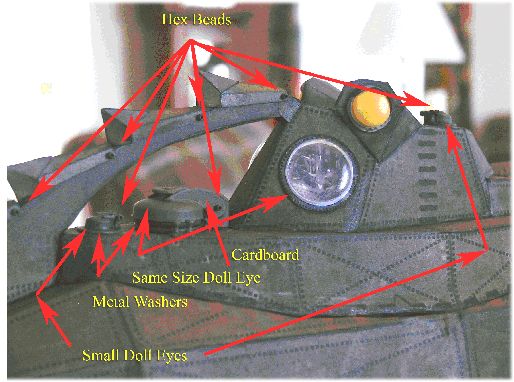
-Michaels Arts and Craft Store is a great place to purchase Glue (more on that below), balsawood of different thicknesses, Hex shaped beads (to be used as bolts along your hull), spray-paint (olive drab and clear dull coat) and most importantly Dolls eyes of different sizes work great for portholes & hatches.
-Glue. Did you know that not all Elmer’s Glue dries clear? [[[ Yes, DO NOT use elmers wood glue, just plain old elmers white glue/school glue is perfect. – JL ]]]
Me neither, so some of my early build pieces had cloudy residue that I needed to fix with paint (see below).
Aleene’s Clear Gel Tacky Glue worked decent for me. Glue sticks work OK, but I did have to re-glue some seams/parts over again. After awhile I switched to Super Glue Gel. With the wood/paper glue, if you used too much, the paper would become soft and ripple. One of my hull sections actually buckled due to pushing 2 halves together. Being as impatient as I am, I appreciated the quick bond of Super Glue and the gel version dried clear and didn’t ripple the paper.
-The Sharpie Marker. This is your best friend.
That's right, it's exactly the same sort of marker that you might usually see being used during a game of bingo. However, with everyone these days playing digital bingo online sites like cheekybingo, you can grab one of these useful pens in order to add details and definition to your Nautilus creation.
I would buy a Fine Point and an Extra Fine Point Sharpie marker to cover up any flaws. As you cut out your pieces, turn them over and use your black Sharpie to color along the edges before you make your folds and glue. Trust me; it’s a pain to do once it’s glued to the sub.
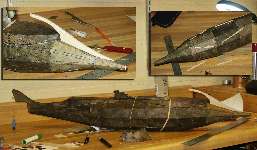
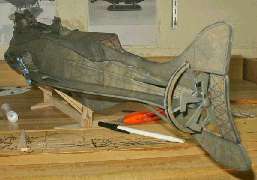
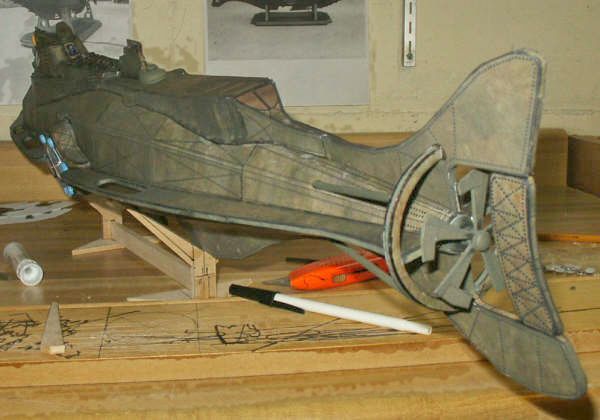
-Support. Being new to paper models, I didn’t believe that paper would support its structure very well [[[ IT will, this is not necessary for a display model; but for
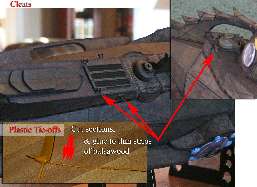
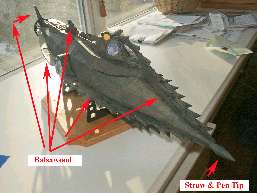
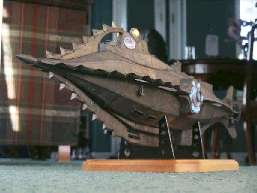
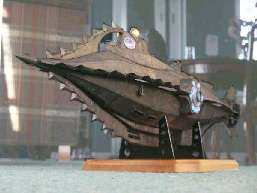
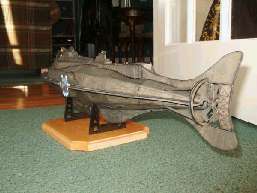
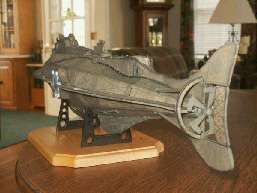
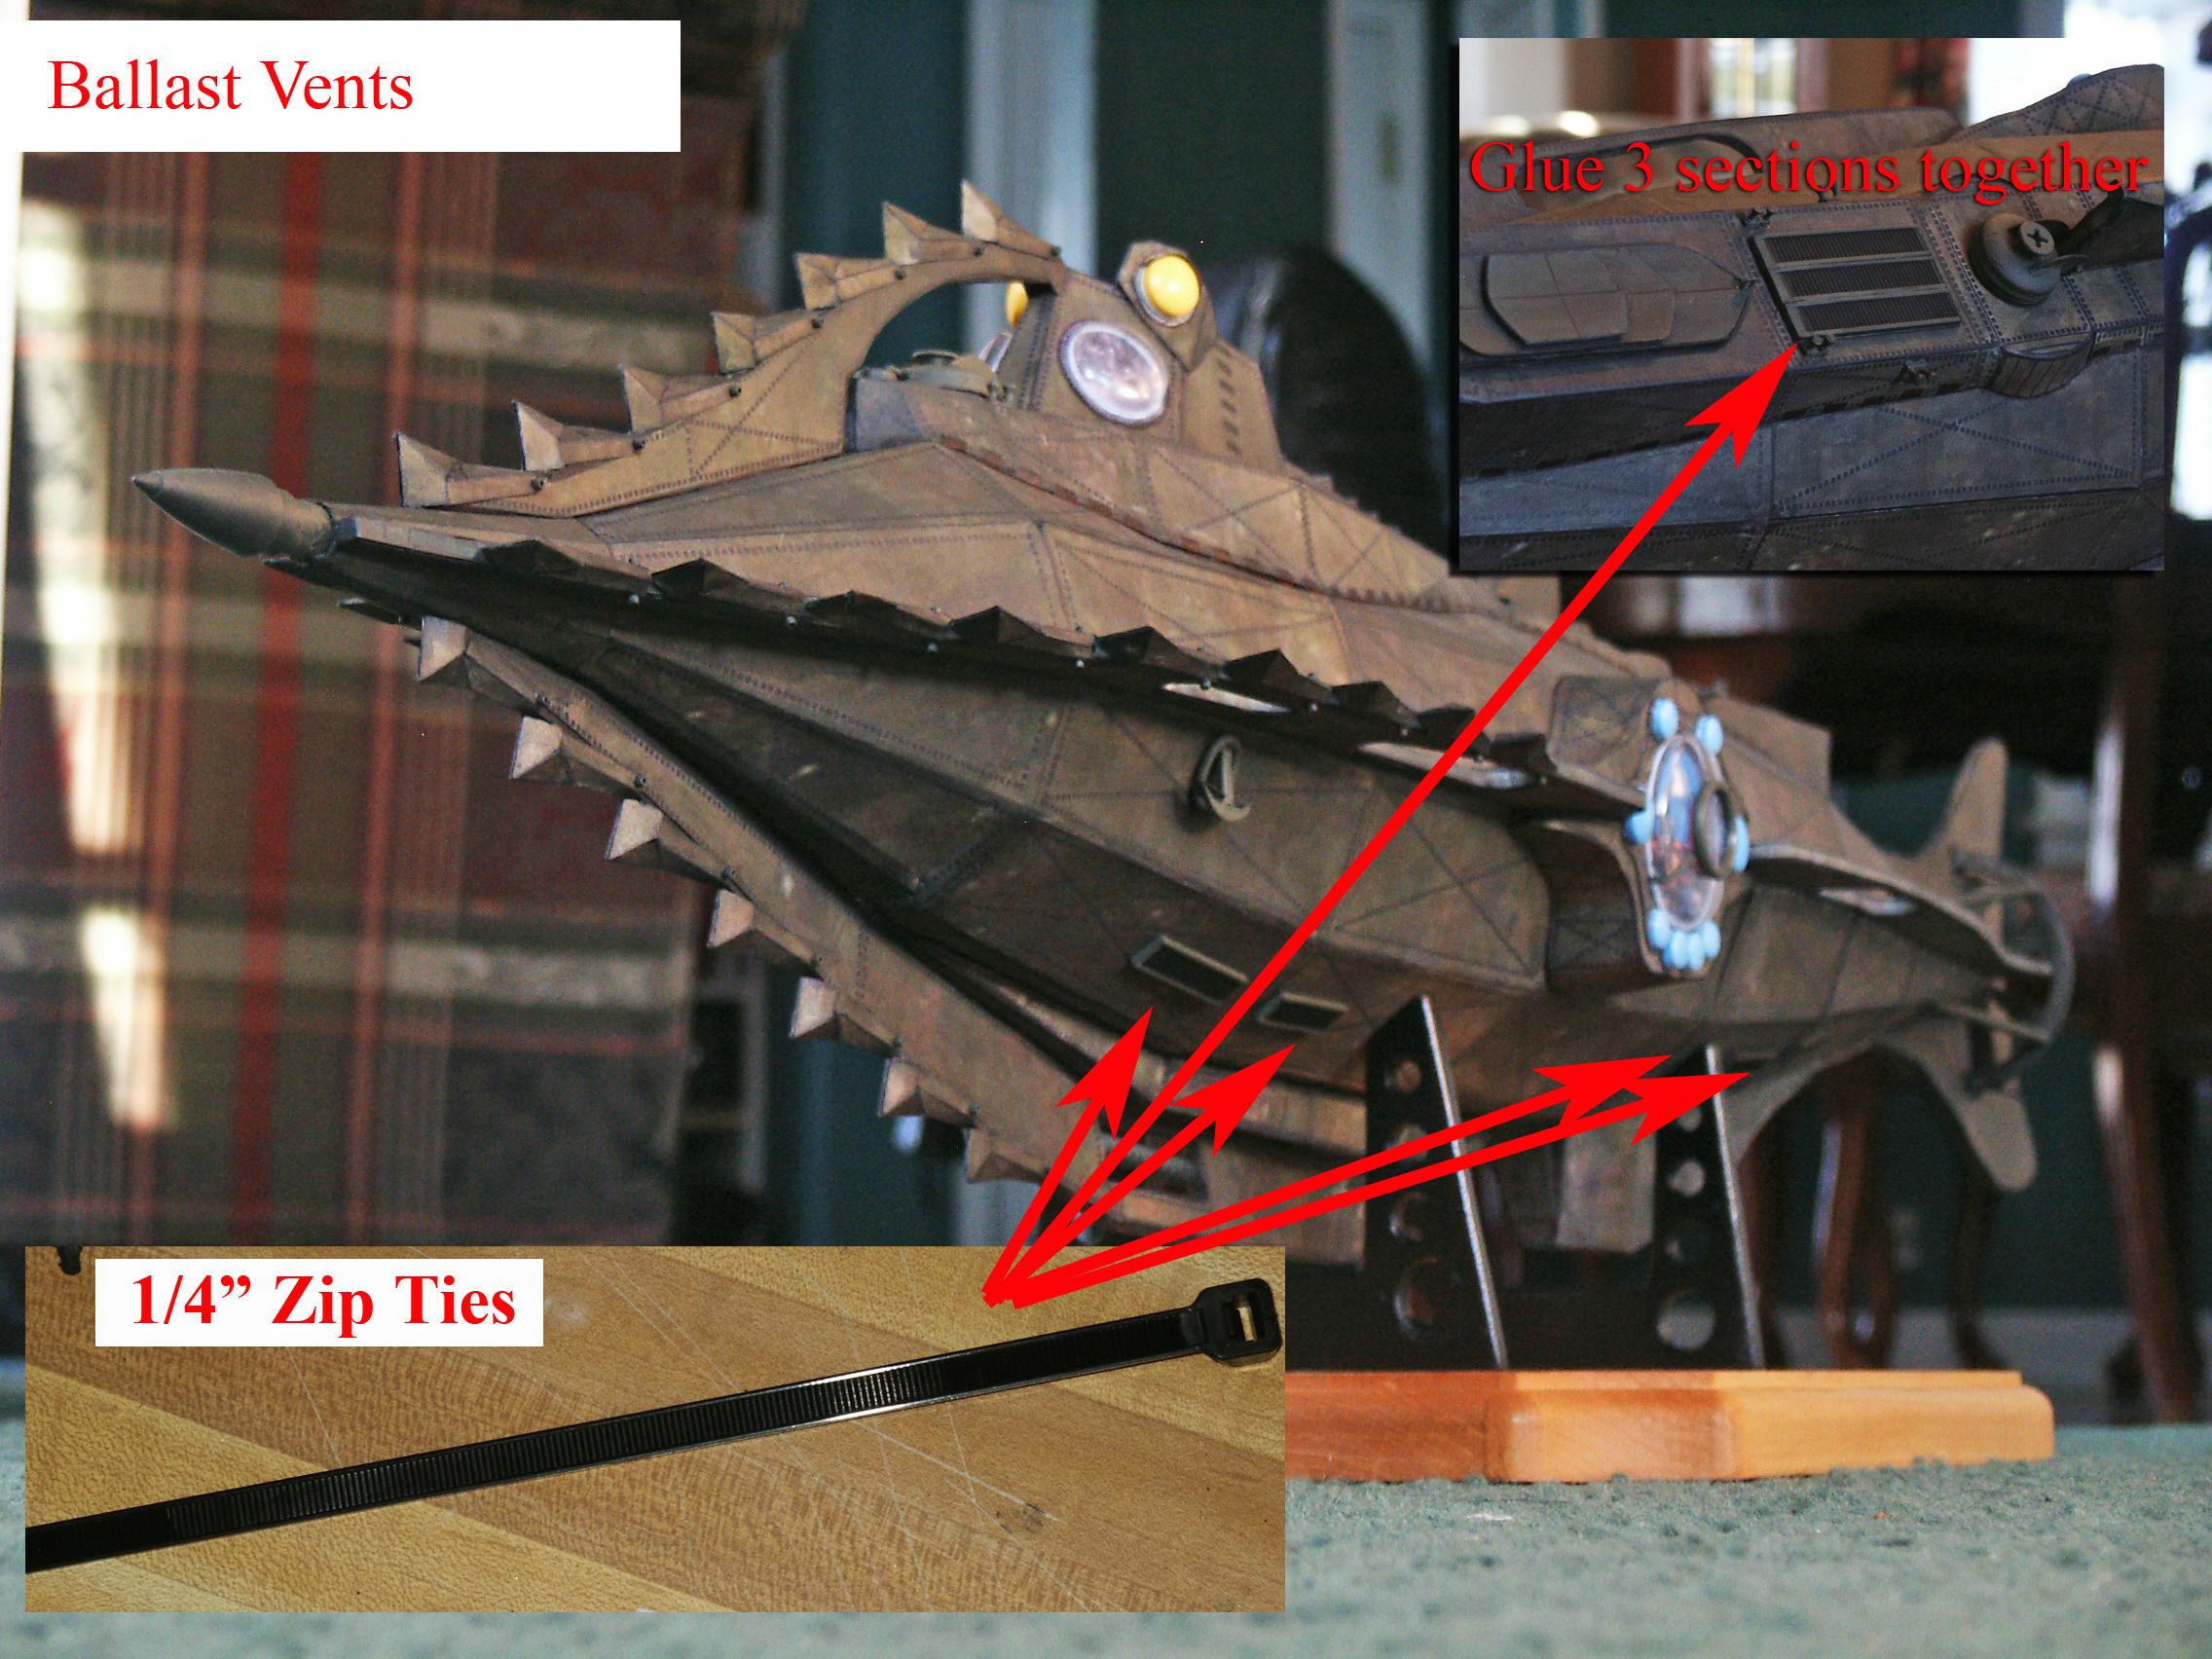
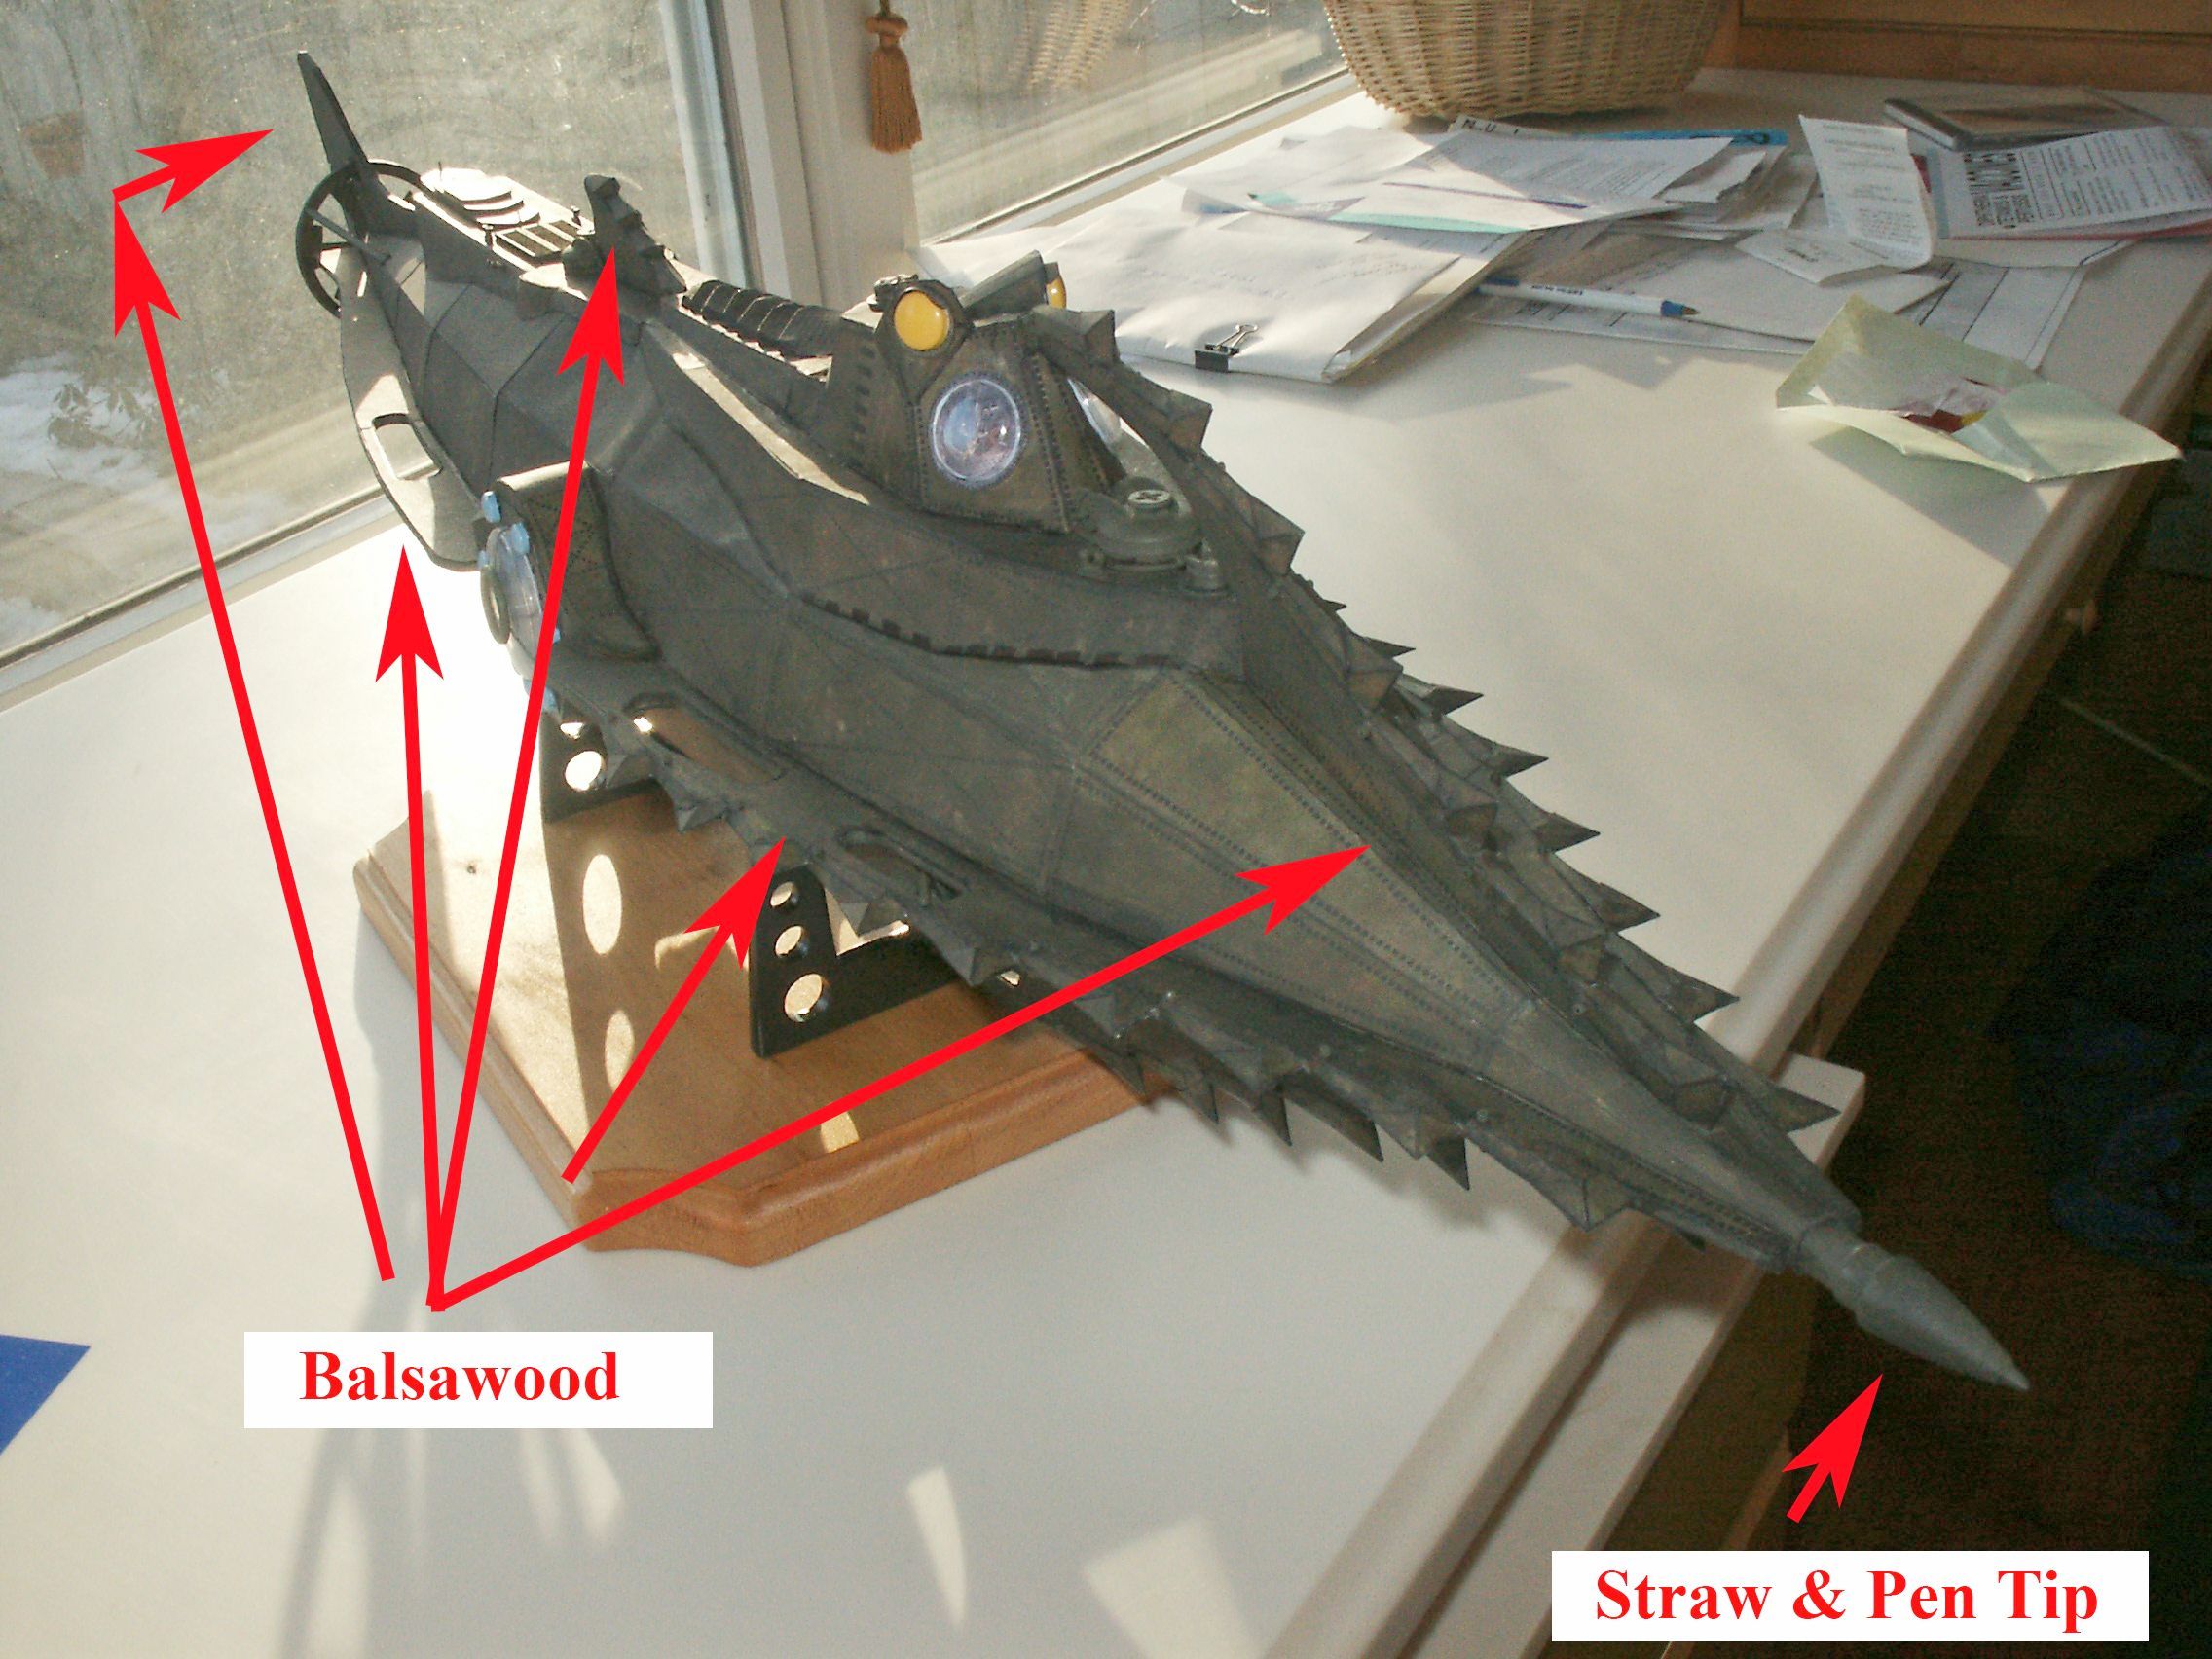
handling/banging around purposes, this is probably a great thing to do. I'd probably do it with corrugated cardboard though– JL ]]] . So, I balsa wooded all the fins, prop, rudder, rails and anchor. Now, if you have patience and plenty of time this is a nice option to do. I was quite happy with the final results:
 But, wood doesn’t bent like paper, so there is a fair amount of trial and error to make the pieces fit. The extra hull sheet included can cover the gaps. I would use the paper model piece as a trace guide on the wood, cut the wood, spray-paint it black then cover the wood with the paper piece.

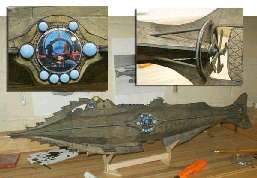
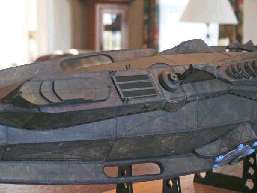
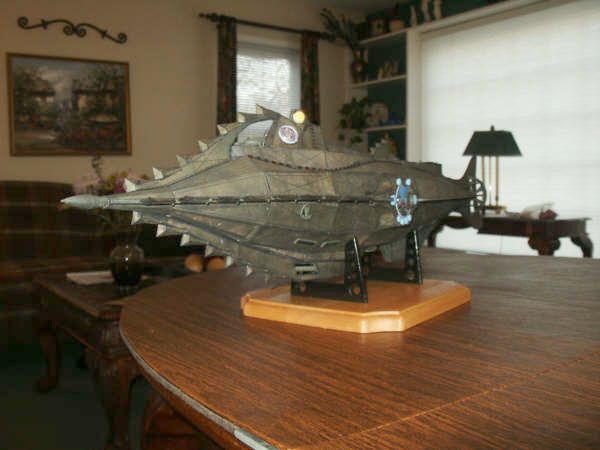
-Paint. A q-tip and watered down mixture of 7/8” black/1/8” green water-based paint, “white-washing” along the hull then wiped with a paper towel or cloth, does a great job of coloring all the cuts, folds, glue marks and scratches on your sub and gives the Nautilus a nice darker tone. A great way to finish your model is to give
it a LIGHT coating of Testers Dull Coat spray-paint to even out the colors (and take out the shine of the #*^$ glue marks). If it goes on too thick, the paper print could separate.
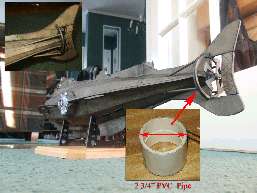
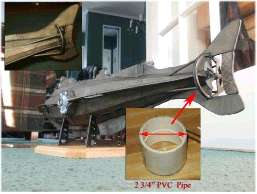
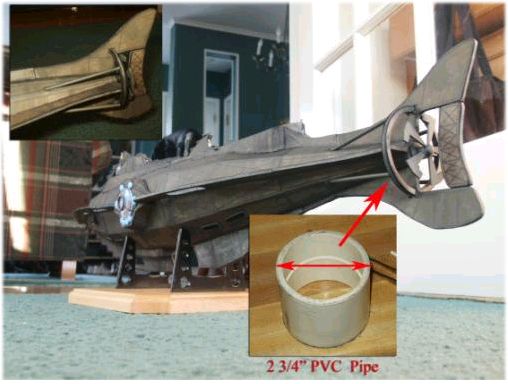
-Detailing. Not only did Michaels have good pieces parts, but Home Depot also helped. This model finally gave me the excuse to buy that Dremmel Tool I always wanted (great for cutting, shaping and sanding the balsawood), but also supplies washers, O-rings and PVC pipe.
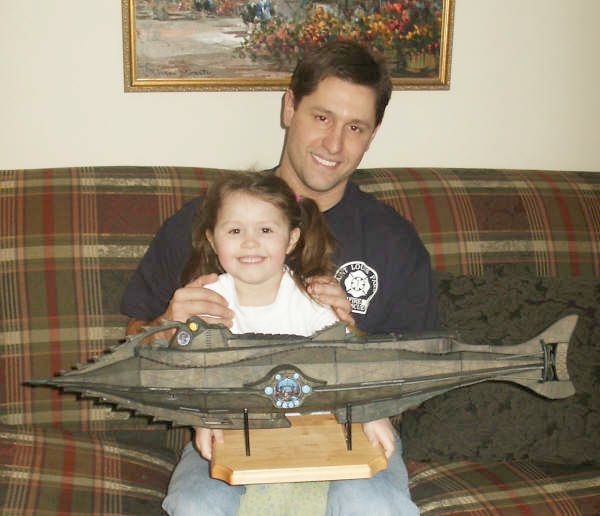
Have fun with it.
Robert Hampton
Bobf131@hotmail.com
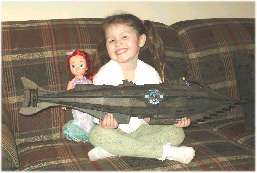
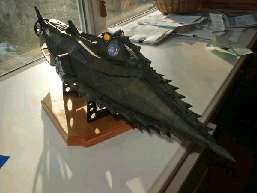
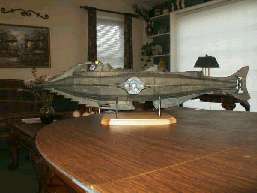
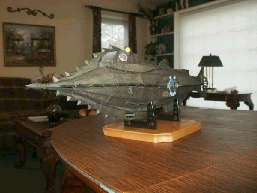
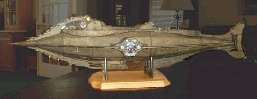
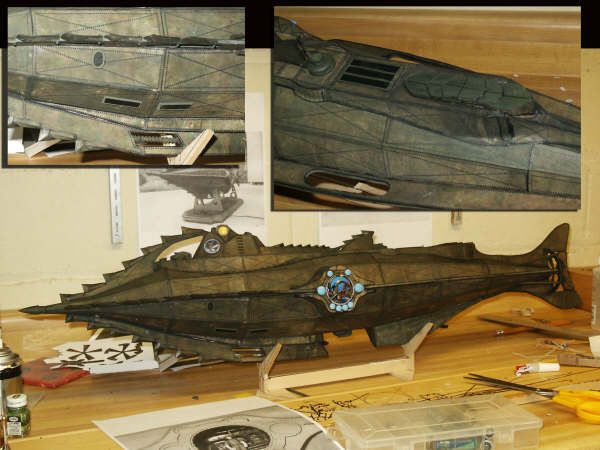
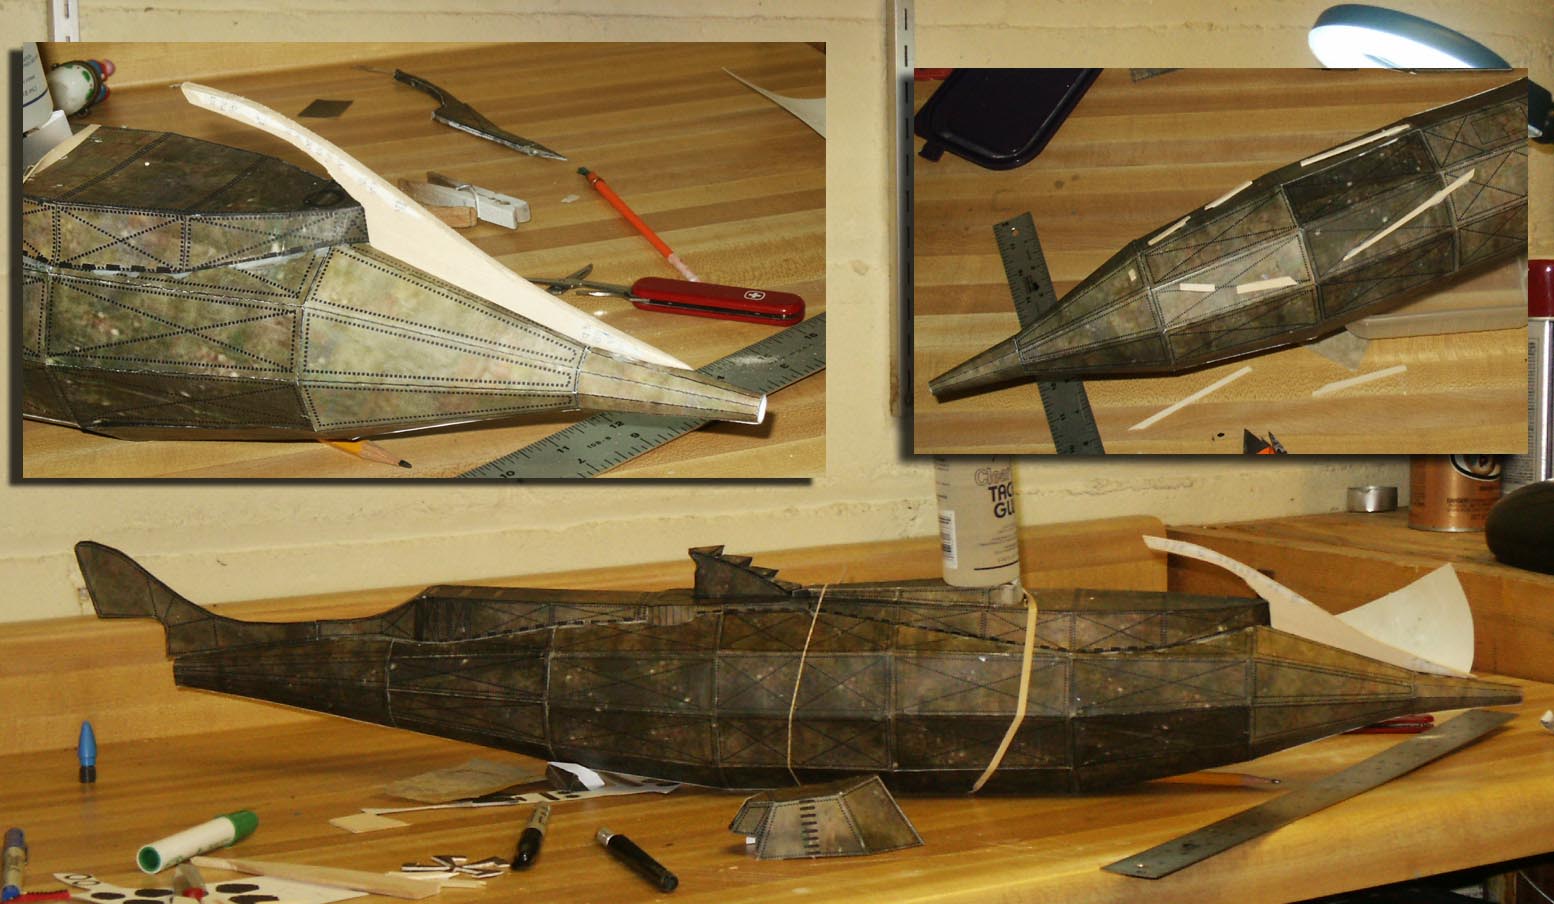
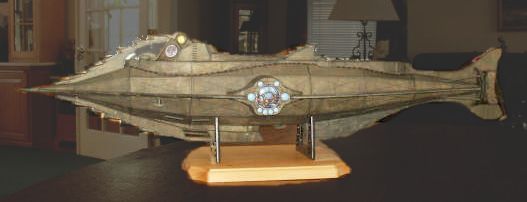
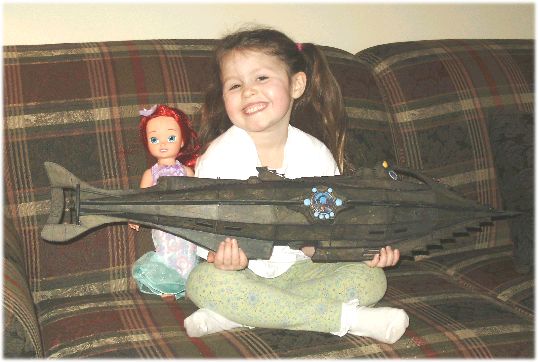
Here are some more images of Bobs build. These are thumbnails and click for enlargements. - JL